10.31.2013

a Halloween flashback

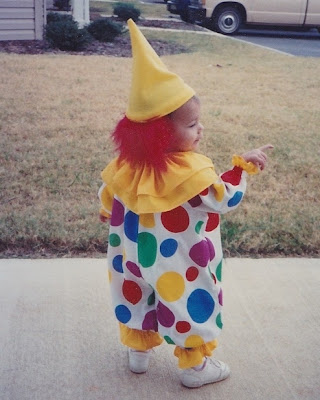
Halloween 1991 was a Halloween of 'firsts' for me.  My oldest daughter, Jennifer, had just turned '1', it was the first Halloween with a child to embrace Halloween parties, hayrides and trick-or-treat, and I made my first Halloween costume for my little girl.  She was a cute clown.
This was made from a pattern long ago discarded on a very inexpensive JCPenney brand machine.  The hat was made of yellow felt and the red 'hair' is red 'fur' sewn around the hat's brim. 
As the years have passed, with no more costumes to make or trick-or-treaters at hand, this time of year finds me enjoying the simple, natural beauty of fall.
Two posts in one day just may be a first for me!  After I published the first post, I realized today was Halloween.  At that point, I thought of this cute little clown's outfit I'd made so looong ago for my daughter, which then led to a morning of pouring over old photo albums packed away to find the photos I'd remembered.   

Pin It

a top comparison

The other day's post showed my new linen skirt and sleeveless cowl top that was recently completed.  I wrote how the vertical stripe pattern in the lacy sweater knit looked a little 'wonky' when wearing due to the way the shoulders are pulled in to make the 'cowl'.

Last night looking at Coldwater Creek's collection, this top caught my eye.
Coldwater Creek: Soft draping tank $44.95 - $49.95
What do you think?  Vertical stripes, softly draping cowl, nicely fitted sides, sleeveless tank.
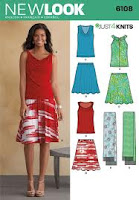
NL6108 view c
I really do love my top!  and now I love it even more!! 

Pin It

10.29.2013

Garment for October 2013 ~ Done!

My October outfit is complete for Sarah Liz's 'Make a Garment a Month Challenge'.  My personal challenge is to complete an entire outfit each month.  The brown suede jacket is rtw.
My initial plan for this month was to complete a longstanding unfinished cardigan that had already been begun out of the lacy-sweater knit, but after finishing the top, made of the very same fabric, the cardigan has been scrapped.  Never mind so much had already been sewn and done, including the lining fabric cut out and ready to put in; this fabric snags on everything and I need to be able to do all the things I love to do, like pick up a sweet pup, without worrying about my clothes.   This little sleeveless top snagged multiple times as it was in the final completion stage, and I'd just had it at that point.
Let's look at the top.  It's NEWLOOK 6108 view c that I've made before, so I knew to cut a size 8 and sew a 1/4" seam.
I agonized over the mechanics of sewing this top much longer than the time it took for its actual construction.    This lacy sweater knit is so sheer (at this time I still thought I'd be making the cardigan and plans were for this little top to 'match' the cardi) and I didn't want seams showing through between that, as my fashion fabric, and a not-so-pretty tan knit used as my 'lining'.  The 'stripes' were cut to go vertically, because I did not want to deal with horizontal stripes after all the matching on my recent 'stripes' top.  It occurred to me AFTER everything was cut out, this would've looked cute cut on the diagonal (bias?) for an asymmetrical look.  Not keen on how my stripes sit a little wonkily as the cowl of the top pulls everything in.... it would've looked better cut horizontally or on the diagonal... better yet, don't make this again out of a striped pattern!  By the way, the cowl is very easy to make with only one pleat at the top of each shoulder seam.   The armholes were serged then tucked in and hand-stitched and that was a great idea because it gave the armhole area a nice finish without a seen seam.   All the other seams were serged with the exception of the cowl neckline, it was straight stitched turned inside out because I knew the drape of the cowl would hide any fabric from the seam showing through the lacy knit.
I usually wear jackets or cardigans with sleeveless tops, so the jacket hides the stripe wonkiness.
The skirt was completed a few weeks ago and blogged about here.  It is linen and the pattern was traced from the BurdaStyle Sewing Handbook.
Our chickens (above right) were so very interested in my little photo session... they kept peeking around the corner of their coop!   Looks like the cat (above left) wanted to be a part of the fun too!  I didn't realize that until I uploaded the photos.
It was really hard deciding not to finish the cardigan.  This was the first time I've completely scrapped an in-process garment; but at the same time, it feels like the right decision and was 'freeing' of sorts.

Now to choose an outfit to make for November.

Pin It

10.25.2013

a lime-green purse for other daughter

While I was photographing older daughter's purse, before wrapping and mailing it to her, younger daughter, Melissa, told me how much she would love to have one of her own too.  She lives here locally, so we made a trip to the fabric store (i.e. Wal-Mart's 'it' in our small town!) and she looked at everything.  We were about to leave empty-handed when she spotted a lime-green almost-lineny type of fabric, and a black quilting cotton with tiny red cherries and lime-green leaves that she liked.  She also liked the idea of red zippers so a handful was purchased.

She listed all the features she would like to have in a 'perfect' purse.  Novita's Reversible Bag Pattern was once again made, and again, because of all the features added, this bag is not reversible.  Melissa's birthday was in the first week of October, so this bag was made up 'in secret' to be wrapped and given as a 'surprise'. 
She wanted an outer zipper pocket, below.  I made the pocket bag out of the lining fabric because I was afraid anything else might be seen from the outside because of the open weave of the lime-green outer fabric.  As a bonus, I was able to pull out a little of the contrasting fabric of the pocket bag before I stitched/top-stitched everything together.  
Inside, she wanted a pocket for her cell phone and a zipper pocket.
Out of one piece of fabric I made a 'faux' 2-pocket pocket by adding a small pleat to one side and another where I thought would work for her cell phone.  Before I stitched it in, I used a decorative stitch on my machine in red thread.
This made a 'flat' pocket to the left, and a 'pleated' pocket to the right for ease in getting the cell phone in and out.  Note to self - be sure to tack the top seams down very well as with the first use, the middle seam popped right out at the top.  I hand-tacked all three seams down well at that point.
 A red zipper interior pocket, magnetic snap closures and label and this purse was done.
Oh, I top-stitched the exterior in red thread holding my breath the whole time because my top-stitching is usually not all that great.  I used black thread in the bobbin.  This was the best my top-stitching has ever looked.  
It's been nice to learn new sewing techniques and improve my sewing skills with a project like these purses.  And now both my daughters each have a new cute purse!

Pin It

10.24.2013

a friend's prayer shawl

A beautiful prayer shawl completed by Kim and given to her friend Lorraine who is battling breast cancer.
Kim's five year old son did a terrific job as photographer!  I love the colors she used in her fringe.
Kim recently completed a Trinity Stitch Prayer Shawl for her friend Lorraine, and with her permission, I wanted to share a little of her story with you today.

She wrote:
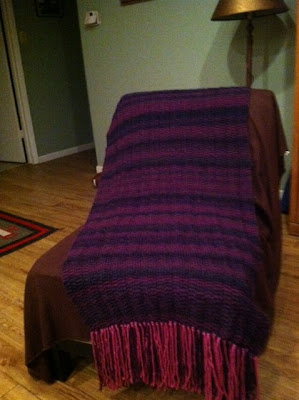
"I just wanted to thank you for your simple but beautiful trinity stitch prayer shawl pattern. My neighbor who I have become very close with over the past 6 months has breast cancer and has gone through chemotherapy and is going in for her 1st surgery today.  In August I decided to knit a prayer shawl for her and came across your website and liked your pattern the best.  I wanted to finish it for her first surgery and was able to meet that goal last night and I delivered it to her this morning at 7am, her surgery is scheduled for noon today.  She loved the shawl and even though she isn't supposed to have to stay overnight in the hospital she said she is taking it with her today. I loved that she loved it.  I don't usually knit stuff for myself but I am thinking of making one for myself.  Lorraine said when she is done with her cancer treatment her and I will sit on the front porch together with our shawls and drink some wine together.  Sounds like a great idea to me!  Thank you for your wonderful website."
We will pray for Lorraine. 

Pin It

10.23.2013

a new planned outfit for October 2013

It's been a creative morning planning my first complete outfit for the 'Make a Garment a Month Challenge' for the month of October.  As you may recall, my personal challenge is to create a coordinated outfit each month.
With today the 23rd of October, my husband's birthday tomorrow and only a week left in this month, I asked Sarah Liz if my recent linen leopard skirt (pattern traced from the BurdaStyle Sewing Handbook) could be included in this month's outfit.  That was 'okay' because it was completed in October, so now to figure the rest of my outfit.
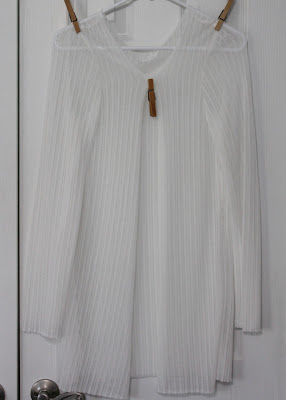
This 'beginning of a cardigan' has been hanging around, looking at me, on the hanger, incomplete, every... single... day... since May with only the shoulder, arm and side seams sewn.  (Lacy ecru/cream does not photograph well against 'white'!)
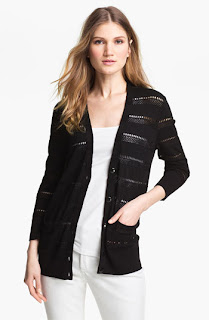
This cute cardi from Nordstrom was my inspiration.  NEWLOOK 6735 cardigan view A looks similar and was chosen.
I had run into a complete roadblock - or rather mental block - when I realized how super thin the lacy ecru/cream knit was.  In the photo below, right, you are looking at the view out my sewing room window - to the left it's through the sheer knit.  I did not want a cardigan this sheer. 
There's a distant mountaintop out there too, blocked by the glare of the sun.
My plan is to fully line my cardigan with a pretty cream fabric and add a pocket like the Nordstrom's.

Okay, cardigan has a plan..... now on to the top.

This cardigan is, and still will be even when lined, very delicate and lightweight so a sleeveless top would work best.  NEWLOOK 6108 view C has been chosen.  I've made this top before (below right), so know how it should fit.  Thinking the slight cowl neckline will add a nice interest.
Will be using a what-was-I-thinking-when-I-purchased this stretchy tannish/brownish/skin-colorish knit.  It photographs more on the gray scale than the tannish color it really is.
To make it all work, the tannish/brownish fabric will be the lining and the lacy knit that the cardi is made from will be the 'fashion' fabric toning everything down.  Hopefully it will have a coordinated look without looking too coordinated, if that makes sense.
This 'challenge' forced me to take the time to make a plan and now I'm ready to work my plan.  Thank you Sarah Liz!


UPDATE:  The finished garment(s) can be read about here

10.22.2013

'Make a Garment a Month' challenge

Earlier this year I began the journey to sew my own clothes.  It has been slow going and a learning curve with every garment.  I've made a cardi here, a skirt or two (or three or four!) there and a couple of little tops.  I am pleased with my humble beginnings, but what I really need is to get all these garment ideas out of my head and into patterns and fabrics, continue to advance my sewing skills, move along at a faster pace and complete, not only individual garments, but coordinated outfits.

Sarah Liz, from SarahLizSewStyle, is hosting a 'Make a Garment a Month' challenge that looks fun and motivating to me.  I've not participated in a 'challenge' or 'sewalong' before but am joining hers today.

My personal challenge to participate in 'Make a Garment a Month' will be to make an entire outfit each month.  That could be a dress, a top with coordinating skirt, a top with coordinating pants.  Cardigans will need to be coordinated with a dress, skirt or pants. 
You can join this challenge at any time and her rules are very doable.  Click here for more information, including how to be a participant.
1.   The garment must be for you and not for someone else - this challenge is also about personal sewing space and your sewing needs.  This is special sewing- for- you time.

2.  Choose a garment at the beginning of the month that you want to make up as your garment of the month.  It can be from a pattern, an idea, a picture from a magazine, snoop shopping - whatever you like.  Post this choice for the month on your blog and tell everyone what pattern you are using or what choice you are making. 

3. Blog about the garment when you have finished it (and in between if you want to).  Please take a photo of yourself wearing the garment - and if you feel that you would like to, style the garment as well.  Clearly label the post "Make a Garment a Month" - my garment for "month".
Thank you Sarah Liz for hosting this 'Make a Garment a Month' challenge!  I look forward to participating, meeting other sewists and rising to the 'challenge' as my wardrobe fills in and becomes more coordinated.

Pin It

10.21.2013

a purse and bag for Jenn

My oldest daughter, Jenn, starts the season of family birthdays with hers falling in mid-September.  She lives out-of-state and far away but I wanted to do something 'homemade' and special for her.
She and I 'follow' each other on Pinterest, and a few months ago she'd pinned a purse that linked back to Novita's Reversible Bag Pattern.  Unbeknownst to her, I'd already been drooling over Yoshimi's versions of Novita's pattern that she'd made here and here.  Eureka!  This would be her 'homemade' birthday present.

Not knowing what fabric she might like, figured one couldn't go wrong with denim.  The lining was a pretty quilting cotton I'd been using in my recent quilt blocks and had totally fallen in love with the color and design and thought it suited Jenn's personality.

I added an interior cell phone pocket.....
....zippered pocket, magnetic closures and a label.
And because one can never have too many little zippered bags, made this one personalized for her.
Struggled a little with the embroidery, as my machine does not do embroidery.

This is how I did her name.

Chose the font at proper size and printed it out on regular paper.  You can see, below, how I cut out the basic shape then free-hand/traced it to my tear-away stabilizer.
It worked better to have my tear-away stabilizer on the top of the right side of my fabric.  Set my machine to a satin-zigzag stitch, lowered the feed dogs, held my breath! and free-hand embroidered her name.
I think it turned out well.  Probably could've used another going over, but I was afraid I'd mess it up at this stage and needed to get in the mail and on its way to the birthday girl.
I love you dear.
Because I added pockets and closures, this bag is not reversible. 
It's an oh-so-cute bag that hopefully Jenn will enjoy and use.

Pin It


Related Posts Plugin for WordPress, Blogger...