12.27.2013

My new sewing companion

Gummy, short for Gumdrop, says 'Hello'. 
She's a most inquisitively curious cocktiel and with her striking colors and photogenic ways she's quite a beauty. 
Gummy belongs to my daughter Melissa, who is a very busy 21 year old college student and isn't at home as much as Gummy would like.  Gummy's been getting oh-so-lonesome, so I've rearranged things a bit in my sewing room to make room for her cage and made a new sewing machine cover to save my machine from the dust she creates.  This was put together in an evening with leftover pieces of tapestry fabric and burgundy faux leather.
Loved working with the faux leather and look forward to making a purse from the rest of the piece.  Oh, and what else might we see laid out on the table?  Could it be the beginning of a top?!  Imagine that!
Yes! progress has been made on my new top NewLook 6735 view B as my Make a Garment a Month Challenge for November.  Yes, I am behind.... very behind.... but determined no matter what.  Hopefully I'll have a finished top to share with you soon.  Better yet - a new top to wear!!
And don't worry Towa, you're still my sewing companion too.
A new sewing companion, new fabrics from Christmas and the beginnings of a great-fitting top.  I'm ready to sew!

Pin It

12.26.2013

A nice Christmas

Hope your Christmas was lovely.  Ours was quiet and laidback = perfect!  My husband made me a custom 'card catalog' to my specifications and needs in his Santa's Workshop and it will be perfect to store notions and sewing miscellany.  He needs to stain it, but otherwise it's already feeling like a wonderful, heirloom piece to me.  I can hardly wait to find a place for it in my sewing room and begin using it.  Maybe it will help me become more organized in 2014?!
And oh the goodness continued with my sister-in-law, who works in a quilt shop (how fun!) sending me a packet of Baby Charms with coordinating fabric for the inner and outer border that she marked for me in the photo below, left.  Melissa, my youngest daughter, gave me 2 different coordinating fabrics, 2 yds. each (perfect yardage!), quilting pins and awesome coordinating buttons in the photo below, right.  I think she knows me well!  My oldest daughter, who lives out of state, sent me Christmas greetings via a sweet card.
I asked Melissa if the two fabrics she purchased were from a 'set' and she said no, she simply walked around until she found 2 that would coordinate with each other in colors that she thought I would like.  I think I need to take her with me to pick out fabric from now on.

Pin It

12.21.2013

Christmas Pillows | 2-in-1

Finished our new Christmas pillows last night just in time to enjoy them for a couple of weeks before packing them away for next year, and wanted to share with you how they turned out and the story behind-the-scenes.

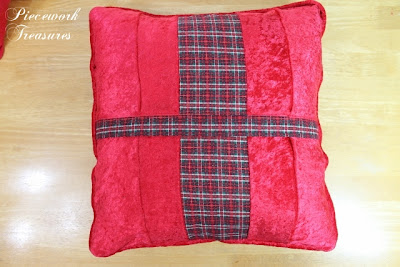
The photo below, was my original vision..... but we like the 'wrong' side, photo above, the best!  What's so neat here, is that if we get tired of one side, we can always turn them over and enjoy a totally different pillow 'look'.  2-in-1?!
It all began realizing we had nary a holiday pillow in our home.  Having made many pillows in the past, thought it'd be a cinch to run up a couple of fun seasonal pillows, and finding a bolt of red velvet panne in my hands at our local Wal-Mart for $3.97/yard, one yard was purchased.  Why one yard?  It seemed like a good idea at the time - thinking there'd be plenty of fabric for 2 @18"x18" pillows.  Well there would've been if I hadn't decided to include piping, as strips were cut off and piping sewn still thinking there'd be plenty of fabric.

These are pillow sleeves because I did not want to store 2 fully stuffed pillows for one whole year.  I began by making two muslin pillows filled with poly-fil stuffing, using my food scale to measure each muslin pillow to make sure each had equal 'stuffing'.  I want to use these in other pillow inserts I'll be making after Christmas.
As you've probably guessed by now, I ran out of fabric.  I ran out of fabric to such a degree that I didn't have enough of one piece to complete one of the backs, and that's why you see the red velvet panne pieced in the pillow below.  I really thought this pillow was going to turn out sooooooo bad - and was sooooo surprised it's our favorite!  The piecing looks like a decorative feature and the plaid criss-cross makes it feel like it's a present waiting to be opened.  Love it!  The plaid also turned out to be great at 'hiding' the opening for the insert.
Wracked my head with all sorts of ideas for the pillow closure from buttons, to velcro, to zipper and decided on a simple sleeve.

...and found out what happens when you do not overlap the fabric enough..... it gaps...
....because it needs @2 1/2" overlap. 
This pillow is perfect.
Let me add I washed and dried the red velvet panne in the washer and dryer before cutting anything out and it laundered beautifully and should be easy to clean in the future.  Not having worked with velvet panne before, I was surprised at how slippy-slidey it was and had a little trouble keeping it through my machine while stitching those narrow piping seams.  Also, once cut the edges would curl like crazy and it was hard to see a 'straight' edge.  These pillows are very 'forgiving' in those areas and ultimately, I am thrilled with our new 2-in-1 seasonal pillows.

Pin It

12.20.2013

Does 1 Davy Crockett bar
equal
1 bowl of oatmeal?

That's what I'm telling myself this morning!  Yesterday was spent in the seasonal rhythm of making these delicious Davy Crockett Bars, filled with pecans, chocolate chips and yes, oatmeal for my husband's Christmas office party.  Isn't it too bad a few didn't fit on the serving platter?!  You can find the recipe posted on our family's Shady Grove Journal along with the recipe for those delicious Peppermint Meringue candies you see smuggled on my breakfast plate too!  These are providing the fuel to complete a couple of red velvet panne'  Christmas pillows whose fabric is so slippy-slidey but will be oh-so pretty and festive when on my sofa.

Pin It


12.18.2013

Bokeh Lights

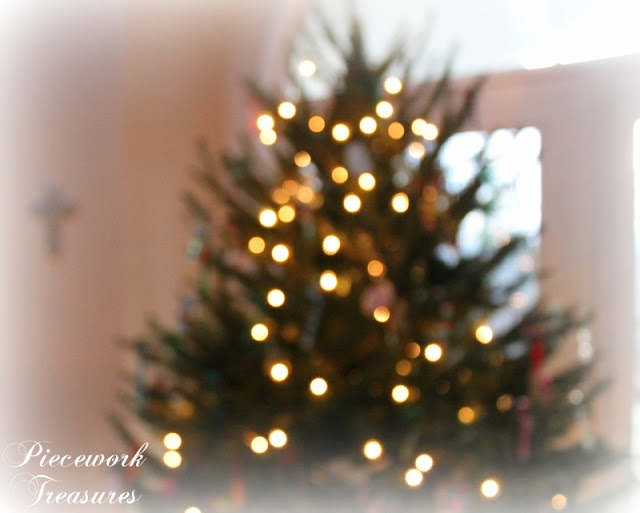
Though I've owned my Canon Rebel T3 for a couple of years now, I've not even begun to explore all its capabilities; so, it's been fun to play with it a little this Christmas season exploring new techniques, particularly trying to duplicate the 'bokeh lights' one sees so much this time of year.

What are bokeh lights?  Could not believe the word 'bokeh' was not in my trusty tome-like 'New Oxford American Dictionary'.  Really, I checked twice to be sure.  Wikipedia basically defines 'bokeh' as 'the good blur'.  Well, they included a lot more sophisticated terms incorporating 'lens aberrations' and 'apertures' but we'll just stick with 'the good blur' here.  Centsational Girl posted an easy tutorial how she created her beautiful bokeh lights, and the photos she used in her post, actually on her whole site, are just beautiful.

What's funny is that I thought I was following her instructions, but re-reading her post as I write mine today I realize basically the only instruction I remembered was to focus your camera on an object up close to the lens, remove the object, then snap your photo, so that's what I did to create the shot below, leaving my camera on automatic and using the regular lens.  Regular lens to me is the 18-55 mm lens.  The object up close to my camera I 'focused' on was my fingers.
Added a little 'snowy' vignette in Picasa for the photo below.
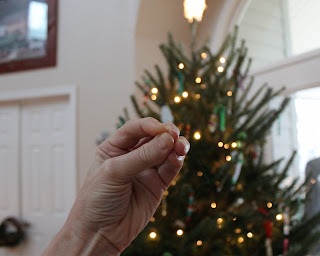
UPDATE:  I thought I'd add a photo of how I focused on my fingers.  Looks funny, almost like playing 'shadow puppets', but it works!
Pin It

12.16.2013

a special quilt's note for someone 'special'

One last post about the quilt I recently made for a child in a children's home in Alabama as part of Gene Black's Quilt Angel Project.  Originally I wasn't going to post the note I included with the quilt, only taking these photos for my own records literally right before the quilt was mailed out, simply so I'd remember what I'd written for future reference when other charity quilts will be made.

I've been pretty much offline these last few days involved with a lot of family activities and totally missed Gene's post about the children's reactions to the quilts when he delivered them this past Saturday.  Gene was kind enough to e-mail me Sunday to let me know how 'the note' was received and the super special young lady who chose my quilt.  Tears filled my eyes as I told my husband I'd just received the best Christmas present.... nothing else could mean so much..... to me.

Reading Gene's blog post this morning made me wonder if maybe I needed to post what I had included in the note as others might be interested also.  Remember, I didn't know if a boy or a girl would choose my quilt.

My simple homemade notecard matched perfectly with the 'blue' theme.
Handwritten note inside.... dated, care instructions, and letting the recipient know he/she was loved and special.  I'm old enough to have a 'thing' about children, young or old, calling me by my first name, so the 'Mrs.' was included.
You've seen the stitched-in quilt label before, but thought I'd show it again.    It says:
. LOVE .
SOUTH CAROLINA
*2013*
My thought process here was that a child might not want some stranger's name on their quilt - particularly if it was a boy??  I don't know, just sharing my thoughts, so I deliberately did not include my name on the quilt, but made sure the year and state was noted..... and of course 'love'. 
With every cut and every stitch, this quilt was made in prayerful thoughtfulness of who might be the one to cuddle and snuggle with it and feel its comfort.    Why is it when we 'do' for others, 'we' are the one to receive the blessings tenfold?!  I've already told Gene to count me in for next year.
Quilt for Alabama
Alabama Quilt in progress
Alabama Quilt coming along
Alabama Quilt ~ Complete
Completed Quilt!

Pin It

12.10.2013

Alabama Quilt ~ Complete

My first 'official' quilt - ever! - with each and every learning step thoroughly enjoyed and am quite satisfied with the results.  This measures @45" x 60".  I am writing my notes here so I'll remember what I've done.
Quilt for AlabamaAlabama quilt in progress and  Alabama quilt coming along brings us to the point of applying the binding.  Having always loved seeing other's continuous binding all rolled up, couldn't resist taking a photo of mine.  Never been happy with smaller projects I've bound, many websites were read and videos watched over and over (and over!) again for this special project, with bits and pieces taken from here and there to be used on this quilt.

From Red Pepper Quilts Binding Tutorial I learned to cut my strips 2 1/4" wide, fold in half and zigzag the raw edges shut.  This helps stabilize things somewhat when stitching the binding on, and feel it was particularly helpful to me as I do not own a walking foot.  Yes, this quilt was done without a walking foot.  Everywhere I turned it seemed every one was telling I HAD to have a walking foot.  But sewing very slowly and taking extra precautions, like preparing the binding carefully this way, everything came together beautifully, matched corners and seams with no puckers.
At this point I switched to Wendi's technique at Shiny Happy World How to Bind a Quilt's video to begin stitching the binding on the quilt.  I liked that you begin this way, photo below, then end by simply continuing your seam.  There are no binding ends to twist and match and meet-up.  At this point can I say how much I appreciate Wendi's video as this was the go-to video for me here.  I also found out you can move a video frame-by-frame offline on your iPad, which I did, to see exactly what some of her finer points were.  I did my own thing by machine stitching the binding to the back first - then machine stitching to the front. 
Photo of the top of the quilt where the binding joined.
Photo of the back of the quilt where the binding joined.  See those nice stitches just shy of the binding?  Thrilled!!! with the way those turned out.  After stitching the binding to the back, I wrapped then pinned the binding to the front, being careful to place the pins exactly where I wanted my stitches to fall..... and it worked!  Not one stitch drifted into the binding, nor strayed off crooked.  I think I bit my lip and held my breath the whole time.  :)  I sewed this step v-e-r-y   s-l-o-w-l-y and only pinned one side at a time.
Oh, I also used Wendi's corner binding technique, also from her video, that makes a beautiful mitered corner oh-so-easy.
The label I stitched into the bottom corner says   .LOVE.   SOUTH CAROLINA   *2013*
All folded up to check the 'trueness'.  Not having dealt with so much fabric before, other than home dec - but that's a totally different type of sewing - I was happy to see all folds up nice and evenly.  No crookedness..... which means (hopefully) all my measurements were correct and cut and sewn straight.
Kept the quilting simple.  Top is 100% cotton, batting is Warm & Natural 100% cotton, and back is a flat twin-sized sheet 60% cotton/40% polyester.
One last look as it's already been mailed and heading to Alabama to be given to a child living in a children's home through the Quilt Angels project led by Gene Black - an Alabama Artist and Quilter.

Pin It

Related Posts Plugin for WordPress, Blogger...