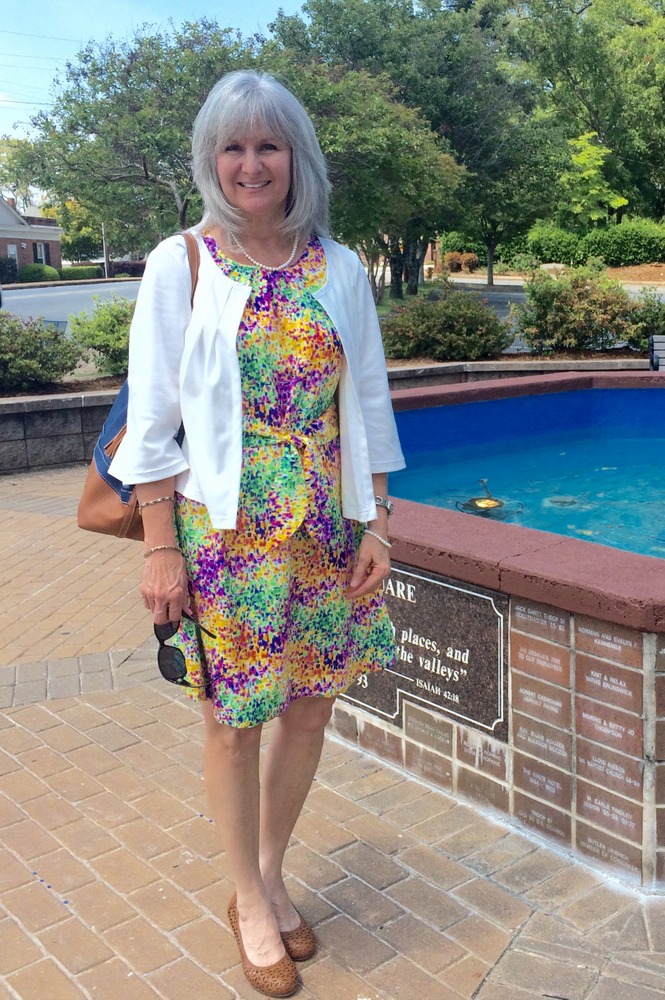
I adore my new jacket! A first for me to make a garment from the Japanese book "Happy Homemade Sew Chic" by Yoshiko Tsukiori, and I enjoyed every single step along the way. This is Pattern N - Jersey Bolero-style Jacket.
Let's see if cream, almost-white, knit photographs better in the shade. Hmmm, not much but I wanted to show more of the details of this pretty jacket. This pattern N is a 'sister' to the same book's pattern D Blouse with Front Tucks. 2 pleats on either side of the plackets on the front....
....with a nice, deep center pleat in the back.... and....
.....I love the sleeves! They are large enough to house the sleeves of my
Rachel Comey Vogue 1247 top easily. Nice! Notice how the wind blows and the inside of my unlined jacket shows? This is why I thought ahead and planned the inside seams to look finished, nice and neat for 'showy' days like this. Thank you oppknits for helping me think that process through! :) I am enjoying
instagram much more than I expected and it's a great way to have conversations about project problems with friends who have much more experience than I.
This little jacket has a nice 'swing' to it too. Have I said how much I love my new jacket?!
There were some mighty curious ladies watching me today! They are piled on top of each other with their necks craning out the fence to see what all the photography was about. Guess they're having a 'hen' party! :)
I so enjoy looking at all the simple designs in 'Happy Homemade Sew Chic' by Yoshiko Tsukiori and try to imagine what they might look like on me. I am 5'7" and not oh-so-thin as her lovely model, so wanting to get a feel for the fit and particulars about Pattern N, Jersey Bolero-style Jacket before cutting anything out, I could
only find one other jacket that has been sewn after a quick Google search. This was interesting to me that many others haven't sewn this jacket, as its classic silhouette would work on different figure types and be a go-with-anything type of jacket. Anyway, the pattern pieces were easy to trace and her line drawing(s) and instructions were detailed and easy to follow. If I was stumped, I just studied her drawings and could figure it out from there.
This knit, unlined jacket was started March 26, 2015 and completed April 8, 2015. That's pretty quick for me, particularly considering how I went the extra mile in finishing techniques on this project. Even all machine threads were carefully hand-sewn in, not snipped. For some reason, once I began this project, it was important for me to put my absolute best work into it. I learned a few new skills along the way too.
The pale-cream, stable knit fabric was purchased off the remnant table at
Hancock's Fabrics in Greenville, South Carolina. Don't remember how much it cost, but it wasn't much.... maybe $10-$15 for the piece and there's a lot left over. A size 12 with seam allowances added per the book's instruction was cut. No alterations were made. You can see the pretty sleeves better below. They are flat-sewn in, which I like.
 |
| Right side view |
Hard to see the inside details..... but shoulder, side and sleeve seams are all flat bound seams per my
Threads Sewing Guide book p. 157 using white polyester silk-like lining material for the 1 1/4" binding. Armscythes are left unfinished.
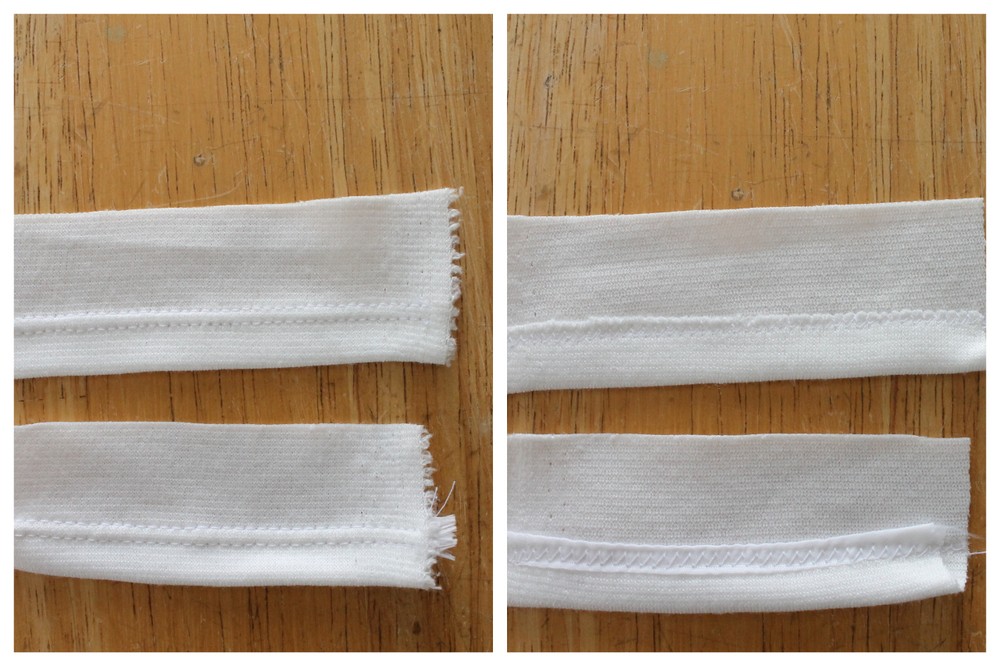
I really struggled with how to finish the sleeve and bottom hems. After stitching a sample enclosing the seam with bias binding, determined it made the garment too stiff, and I wanted this jacket to have swing and movement. Also, I was afraid it wouldn't 'pleat' where all the pleats are, so decided to simply sew carefully and encase the top of the unfinished edge of the hem with the top of my double-needle.
 |
| Inside view |
A few of my samples. I sampled everything on this project! You can see below how much better the hems look double-needle stitched instead of bias bound. Bias binding is on the bottom of each photo. Very stiff.
Just a few of my neckline samples, below. The sample to the left represents the book's instruction. For some reason, I was afraid this would make my jacket feel too 'formal' so instead supplemented my Alabama Chanin neckline version
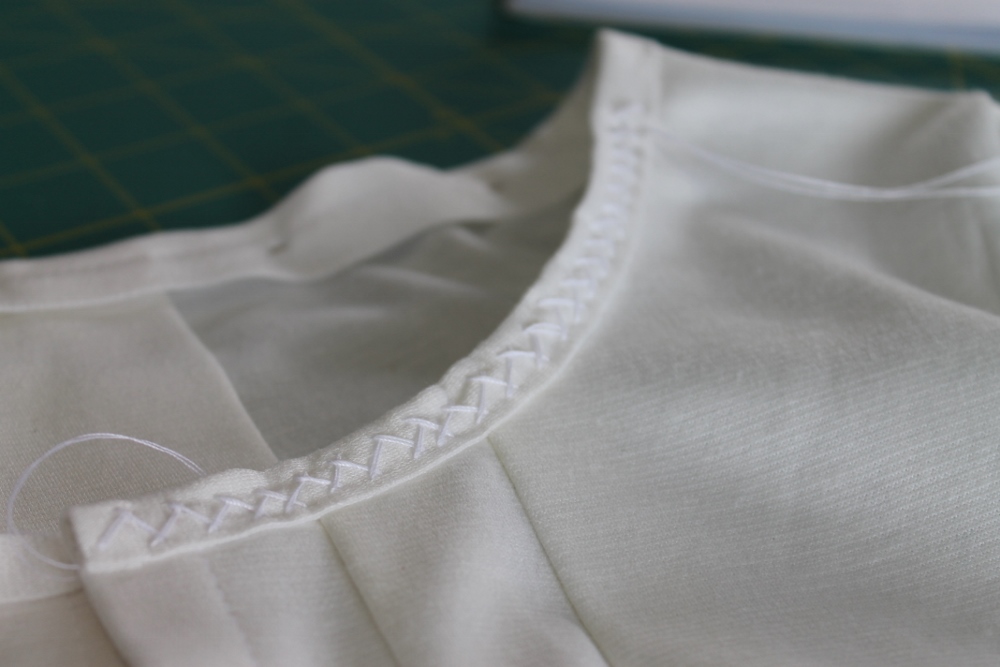
using the same technique I'd used on previous knit tops. 1 3/8" strip of knit, cut off-grain in this case (not bias as per the book), overlapped 1/2" to the front of the jacket, stitched with 3/8" seam to the inside for more stability while embroidering. The back seam was left in after embroidering to help with the overall stability of the jacket's neckline. Used double thread of white Button Craft Thread for the herringbone stitch embroidery. The excess binding was cut off the inside (very carefully!) after the embroidering was complete. I decided to cut the binding off grain because there is so much room in this jacket, you don't need to worry about the neckline needing to stretch. In fact, I wanted it stable, and deliberately cut the strips where there would be less stretch.
Neckline handstitching in process. It is so much easier to embroider with the binding longer to the inside.
Neckline done. The longer inside was cut back to the stitching after embroidering.
Sample for flat bound seam using 1 1/4" binding. This is such an easy technique with beautiful, satisfying results. Will definitely be used on future projects.
Looking at the bright blue sky with soaring mid-80 F temps, you'd never know today's forecast was for severe thunderstorms. Yesterday, between rainshowers, I planted seeds for our summer vegetable garden specifically with the plan that they'd get a good soaking today. It's hard to outsmart Mother Nature. :)
Rachel Comey Vogue 1247 top
Self-drafted, lined, elastic waist skirt


