The ever dependable Kirsten Kimono Tee pattern paired with a favorite, NEWLOOK 6192 skirt pattern, always pleases.
Before I show you my new pieces, I experimented with my camera settings this morning. I use a Canon Rebel T3 camera that I've had for 5-6 years now. It was purchased when I was wanting to take better nature photos. It does not have wireless remote capability, so all my photos have to be self-timed which makes it tricky for the camera to know what to focus on. One of my goals for this year was to work on my overall photography skills, concentrating on 'light' as well as learn how to use the 'manual' mode successfully. Most, if not all my photos up until now, have been taken using one of the 'automatic' modes.
In the photo below, the sun was not only behind me, but completely shielded by the house. The photo turned out with a sort of misty, moisty look, even though this was not a misty morning.
Out in the sun now by the front island. The mid-morning sun is shining on my left side. The photo below left, was taken with the camera's 'automatic' mode. The photo below right, was taken on 'manual' mode with my controlling all the settings. Insert *big smile* here. :) There were plenty of outtakes of over exposed/under exposed that I won't bore you with.... but what a thrill to finally
see improvement.
Okay, let's talk about this cute outfit. Not much to say about the white knit Kirsten Kimono Tee as this is my 6th. The Kirsten Kimono Tee is a free download from MariaDenmark and is a hardworking basic in my wardrobe.
Needing barely 1 yard of fabric, an hour or so of construction time and you
have a great little top. This particular one was made with Wal-Mart's
new line of cotton/spandex knit fabric, 60" wide at $5.98/yard. At first I didn't like the way
it was sewing, but some of that frustration may be because my serger is
not cooperating lately, so I'm serging with 3 threads, not 4. This top
has serged seams with zig-zagged machine stitched hem. Cost $5.98.
Back view.
Have you noticed the hands in the...... pockets?!!! I am putting pockets into everything now!! :)
This NEWLOOK 6192 skirt pattern, view B (the bottom red one on the pattern jacket), is my all-time favorite pattern for an elastic-waist woven fabric skirt. I have even made one out of knit. Today's woven skirt is my 5th version from this pattern. This pattern does not include pockets, so I used the Ottobre pockets from no. 14 Pants.
This pattern is so easy and simple, it only has 1 pattern piece for the front/back. My fabric is another purchase from Wal-Mart's new fabric line of 100% cotton, 43" wide at $4.98/yard. I only purchased 1 yard of fabric to make something else and sort of switched gears here. This pattern requires 1 1/2 yards, so I decided to make the amount of fabric I had 'work'..... and feel I've created a much better garment overall than if I'd had enough fabric to begin with. What I finally came up with: the casing for the 1" elastic is made out of a soft white knit.... the fashion fabric with a band of gray jersey knit (leftover from my Alabama Chanin 4-panel skirt) ... lined with 100% white cotton sewn in as an underlining, not as a traditional lining. The white knit casing does not bother me as no shirt will ever be tucked in. Also, the knit is soft against the skin, which is nice.
I re-traced my pattern on the Pellon 830 Easy Pattern interfacing, cut off the band area based on the amount of fashion fabric I had, and added 1/4" seam allowance. I wear a size 10 with 1/4" seam allowances with this skirt.
A peek at the bottom insides. I cut the white underlining off at the top of the gray knit band and sewed a small baby hem. I didn't want the knit to look 'stiff'. The knit hem was barely turned up and machine straight-stitched. The skirt runs on the short side.
To construct the skirt with a traditional lining, or with an
underlining, gave me some pondering moments ultimately deciding to go with the underlining because of the pockets. Thought it'd be
easier to access the pockets if they weren't sandwiched between 2 layers
of fabric. Seams are serged. Here you can see the modified Ottobre in-seam pocket pattern. Also, I did not (and do not) construct the waistband per the pattern instructions. I sew on the waistband casing provided and use 1" elastic and like the ample room in the casing. It makes for a comfortable 'fit' for me.
This outfit completes my August 2015 Make a Garment a Month challenge, as both pieces are most definitely 'Awesomely Average'!
Now on to the next project!
Happy Sewing Everyone!
8.25.2015
8.21.2015
My 'Pets on Quilt Show 2015' entry
Lily Pad Quilting's annual Pets on Quilt Show 2015 has begun and 'Road to Oklahoma' is my entry.....
....but......
....not....
....this side.....
..... THIS side is my entry.....
..... in the category Animal-theme Quilt because of this lovely woodland deer scene fabric. My official entry page can be found here.
For those who may be new readers, I am from Alabama, with family roots that run deep in Oklahoma history as my family, on my mother's side, were a part of the Oklahoma Land Rush. Beloved family members still live in Oklahoma and I made this quilt for my sweet cousin Clifford as a gift of gratitude for being oh-so-sweet to me when I was a little girl and would visit out there. He'd put everything aside to play with me. Always such fun!!! My husband planned a trip to Oklahoma last October 2014 just so I could personally give this quilt to Clifford, who you see with me, below. This quilt was pieced using the 'Road to Oklahoma' block for the front, and the woodland deer scene fabric on the back because Clifford loves deer so...... so much in fact, that when he opened the package, he first thought the deer scene was the front! And ya' know.... that's okay with me.
I've included the links for those who are new, who may want to read the entire story of this quilt, because part of making a quilt..... is telling its story.
*'Road to Oklahoma' - the beginning
*Assembly Line progress
*The top is done..... or is it?!
*Let the quilting begin!
*'just keep quilting.... just keep quilting....'
*Complete!
*The rest of the story
And *sigh*, no entry with cute little Towa this year. Try as I might, I just could not get her to pose all cute-like on 'Dreaming of Spring'. You know how these diva models can be...... and of course she's not spoiled.... and yes she has her own pink baby blanket. :)
Lily Pad Quilting's 'Pets on Quilts Show 2015' will be open for entries until 8.26.2015, then the voting begins 8.27.2015. You might want to stop by and see the awesome quilting talent, not to mention the oh-so-cute pups and kitties.
Happy Sewing Everyone!
8.18.2015
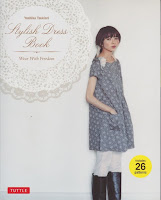
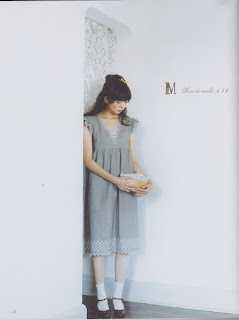
Pattern M, Stylish Dress Book by Yoshiko Tsukiori
An airy, breezy sweet summer dress has been made.
I've been wanting to try more dresses from Yoshiko Tsukiori's 'Stylish Dress Book Wear With Freedom' book...
...and chose Pattern M because I thought it'd make a fun, cool, easy-to-wear summer dress for those 97 degree days.
The v-neck is low, hem is long and 'sleeves' are little ruffly things....but this dress has so much potential!
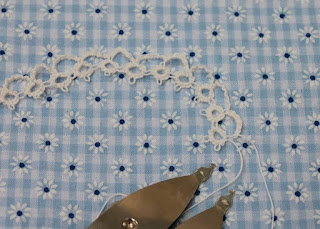
Purchased 2 1/2 yards of 100% cotton pale blue gingham with raised little white daisies, 63" wide at Joann for 50% off $14.99/yard. Nothing, not even scraps are left over. This dress cost $18.75 to make. I did not add the pre-planned tatting after all.
Many modifications were needed to make this dress wearable for me. I traced a size 12 adding 3/8" seam allowances. Some seams are french seams, and some seams are simply serged. Raised the neckline @1" and redrew the neckline angle. This dress is designed to be made with scalloped edged fabric, and as mine was not, I had to consider the neckline finish. Fresh off making all the Ottobre Sculpture no. 10 tops with baby hems.... jumped right in and sewed baby hems on this neckline by simply turning in a mere 1/4" seam, machine stitch, then turn in again a 1/4" seam and machine stitch. There may be a little wobble in the way the neckline lays, but not much. Also added a 1 1/2" band around the front and back between the bodice and the skirt. The gathers were hitting me mid-bust and wasn't sure how that would 'wear' for me, so thought adding the band would work better. Cut the band on the bias for a little interest. Also cut and sewed a curved hem, not straight as per pattern. Cut 2" off length and still hemmed up 2". Added in-seam pockets. I *heart* pockets! :)
You can see the neckline finish better in this photo below, as well as the band I added.
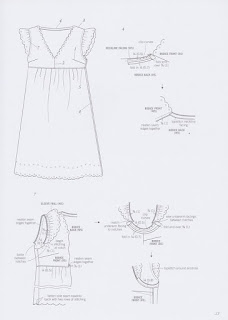
Since I seemed to be on an Ottobre roll, decided to finish the back neckline also the same as the Sculpture No. 10 tops. Cut 1" bias binding for the back neckline. Thought I'd try to show you here a little of how Ottobre has you attach the back neckline binding. You first finish the front neckline, then sew the back neckline binding, right sides together 1/4" seam allowance #1, below. Then you stitch the shoulder seams, being careful not to catch, or stitch on the neckline binding #2, below. Then you fold over the (right-side) neckline binding edge to the front shoulder seam, and stitch on that seamline #3, below.... then turn it right side out and top-stitch down..... and voila'.... the seam is enclosed with little bulk.
Like this.
Pretty proud of my neckline binding stitching here too. Nice and even. This cotton was a dream to work with compared to the crepe de chine, and silky prints I've been working with recently.
I dealt with the ruffly 'sleeve' a little like it looked like Carolyn did..... by treating it like a cap sleeve, only mine needed a little dart at the shoulder seam to give it more roundness. You can see Carolyn's pretty dress here and I found examples made by other women here, here and here.
It was strange outside lighting today and my photos are a little washed out, but you can see how the sleeve fits me in the photo below. I like this sleeve on me. It's a little more shoulder coverage than sleeveless, and that's a good thing.
Beware, this dress is voluminous! And I mean voluminous!!!!! My cotton probably was a little stiffer than this pattern needs.... but oh my goodness. After attaching the skirt to the bodice, I knew I needed some sort of tie-belt or re-make the entire skirt.... particularly the back. Since it is already mid-August and the wearable time for this dress is realistically only a few more weeks, decided to go the quick route and add an in-seam belt that ties in the back. Below, is where I'm trying to decide what type of belt to make..... as wide as the bodice band I added, or thin and skinny.
The thin, skinny belt was a good choice, even though you can hardly see it here! Tames the back....
...and below you can get an idea of how blowy and breezy it is, even with the belt. Still unsure about this silhouette on me.
This dress completes my Make a Garment a Month July 2015 plans.
Overall I like my new dress, but not sure if I will make it again. This is a completely different style for me than I've ever worn, so that has taken a little getting used to. The shoes helped..... a lot. At first I was afraid it looked nightgown-ish.... but the red wedge shoes really 'make' the outfit.... to me. Also wondering if I can shorten it a little more and that'd help?
And I was lucky to have my sweet daughter, Melissa, spend an afternoon at Lake Jocassee with me this past week. She has been busy all summer with college classes and begins her senior year tomorrow, so I only had her to myself for a few days. So glad she still likes to spend a little time with her mother enjoying the great outdoors!
This dress has been planned since June. Temps have consistently been 97 degrees since mid-May..... through June AND July, which is most unusual for this area of South Carolina. August is usually our 97 degree month. The dress is done..... our temps have hovered around 82 degrees since the first of August..... every.... day..... with today raining and cool. NOT the weather I'd made this dress for. *sigh* At least it will be ready to wear and (feel like new!) for NEXT summer. :)
Subscribe to:
Posts (Atom)


