8.30.2016

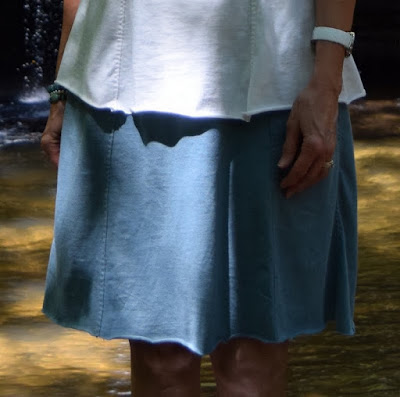
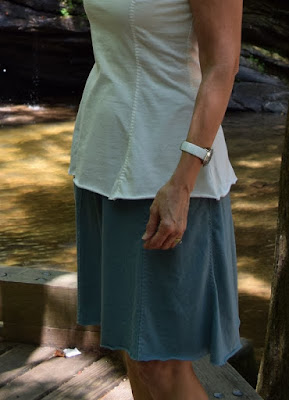
Alabama Chanin 6-panel Skirt modified from 4-panel Short-fitted Skirt pattern

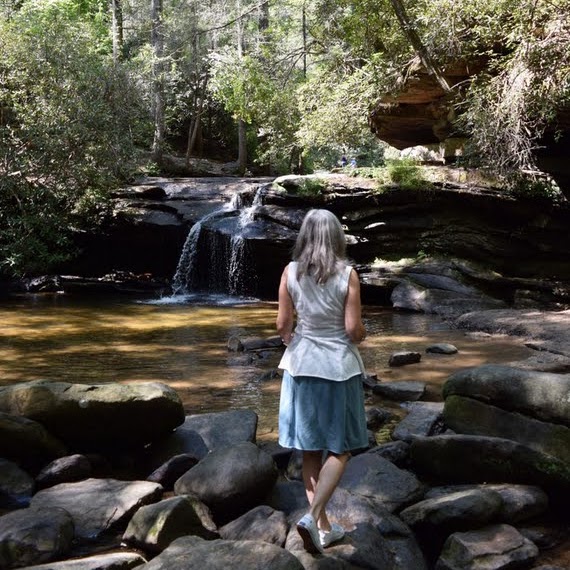
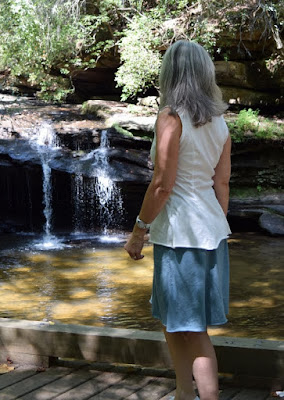
On this extremely hot warm August afternoon it was deemed a perfect day to catch a waterfall at Table Rock State Park.  School has started so the park was quite quiet.  Almost felt like I had this beautiful nature all to myself.  Nice. 
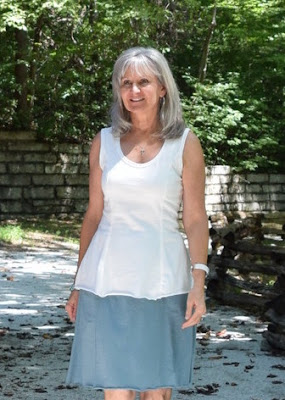
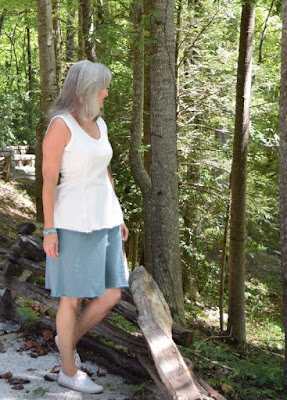
I'm wearing my Alabama Chanin hand-stitched modified 6-panel skirt along with the AC hand-stitched 6-panel Tank Top.   Interesting in that I made these pieces to be an ensemble, but now they are made I don't really care for them together.  But today I am showing them as the ensemble they were meant to be.
This is the very same Alabama Chanin 100% organic medium-weight jersey in Dusk that matches the mid-length skirt of Carolyn's beautiful version.  I had kept a sliver of yardage and thought it'd be fun to make something out of the same fabric she used.  You know.... sort of as homage to a sweet friendship across the ocean.  :) 
Her entire breathtaking outfit always blows me away when I see her pictures, but especially her fully stenciled, embroidered and appliqued mid-length skirt where she used her Dusk fabric.  *Swoon*
Mine is simply hand-stitched.  With pockets.
All inner construction stitches are hand-stitched with double strands of Coats and Clark Button Craft Thread, then flat-felled with a single strand.  I added pockets.  Pockets are always good, right?!  :)
But let's back up and start at the beginning.  I really wanted to make the 6-panel Gore Skirt from the book Alabama Studio Style that was designed to be a part of my 6-panel Tank Top from the same pattern sheet.  After the pattern was traced and cut out I quickly found out that my sliver of fabric would not accommodate that pattern.  At all.  Having already made the 4-panel Short Fitted Skirt from Natalie Chanin's Alabama Studio Sewing + Design   I knew how it fit, so thought the pattern might could be modified into a 6-panel skirt.   Photo below is the 4-panel Short Fitted Skirt.  I love this thing and wear it all the time.
Anyway, I had my heart set on a 6-panel skirt with pockets, so with great bravery and courage..... much unlike my usual think, re-think and analyze everything self when cutting precious fabric.... I cut my 4-panel skirt pattern into a pattern for a 6-panel skirt and promptly cut into my precious Alabama Chanin fabric.  Still cannot believe I did all that that quickly!
And it worked out well.  Almost all is hand-stitched with Coats and Clark Button Craft thread.... double strands for inner construction stitches, and single strand for the flat-felled seams with machine-stitched turned down casing for 1" elastic at the waist.  
Pocket bags were serged because I used a woven and did not want them to fray.  Worried about having enough room at the hips for the pockets, and knowing I shortened the 4-panel skirt 2" at the hemline.... instead of taking the 2" off at the hem on this skirt, I took the 2" off at the waist which made for a little more room for the pockets.
I'd run out of the Dusk fabric, but had enough scraps to make part of the pocket bag that might be seen and used a darker blue woven for the rest of the bag.
With the hand-stitching, you can stitch down the front of the pocket openings and I really like the look of this a lot.
So there it is.  My Alabama Chanin simple ensemble. 
I like.... no love..... both pieces separately, but am not keen on them together.  The skirt is the most comfortable skirt, and the Alabama Chanin organic cotton jersey is the softest cotton jersey fabric against the skin.... but the skirt feels sort of 'full' at the waist and grabs the jersey tank top and makes me feel a little frumpy?  Not that flattering on my figure, maybe?  Anyway, the skirt is mostly worn at home and is most loved for the comfort it affords.  I will say, now that I've got a couple of simple AC garments under my belt, feel I am better prepared to tackle a more challenging project.  Am also finding that I love the hand-stitching process.
And it was oh-so-nice to spend a few minutes at one of the waterfalls along the Carrick Creek Trail this day.
Happy Sewing Everyone!  :)

8.24.2016

Alabama Chanin 6-panel Tank Top in Alabama Chanin fabric

The Alabama Chanin 6-panel Tank Top made from Alabama Chanin organic 100% cotton fabric is done!  And I'm in love!  Total love!!!
This pattern was totally designed for me.  No not really, but it made up into an almost custom fit with no modifications on my part at all.   Figure flattering from all angles and oh-so-comfortable with no gaping neckline to worry about.
I purchased the Alabama Studio Sewing Patterns book from the Alabama Chanin website during one of her great sales, and it is a treasure trove of all her patterns in one place, as well as a compilation of all her techniques as well how to adjust patterns to fit.  There was no problem printing the pattern from the included CD, though as a heads up..... you can't just print the pattern you want.  You have to print all the tiles to go with the sheet of patterns.  For instance, this 6-panel Tank Top is also part of the 6-Panel Camisole Top both from her Alabama Studio Style book.... as well as the corresponding tunic and dresses and skirt.... so all printed because they are nested together.  That's okay as I want to make the skirt one day too.
Image
Photo Credit Alabama Chanin
The princess seams drew me to choosing this top, along with the flare at the waist.
I made a Size M, as per my measurements.  All hand-stitched using Alabama Chanin's white, medium weight, 100% organic cotton fabric.  I paid @$26.00 per yard.  This top takes a mere yard.  And while we are talking about fabric..... this fabric is so soft and has a most luxurious feeling..... different than any other cotton jersey I've felt before.  The inner seams were constructed with double strands of Coats and Clark Button Craft Thread, with the felled seams in single strands.  Love the way the hand-stitched seams make their own design detail.  As you can see from the photo below, this top measures 25" from shoulder seam to hemline.... and that's what mine measured too. 
At first I thought it seemed a little long, but now I like it.  Hem was left raw.
Photo below shows the 1 1/4" binding strips ironed wrong sides together, then pinned to neckline enclosing the raw fabric.  I pulled the binding ever so slightly as I pinned to the neckline, pulling the neckline in a little once it was stitched.  The Cretan Stitch was auditioned for the neckline and armhole stitching.  I've always used the Herringbone Stitch and wanted to try something different this time and really like the Cretan Stitch.
And surprisingly this is my favorite skirt to wear with this top!  I've been saving my recently made Alabama Chanin skirt to showcase both pieces together, and then realized this top needed THIS skirt.  This cute 7-piece skirt with curved waistband traced from the BurdaStyle Sewing Handbook was one of my first makes back in 2013.  Always a little large, coupled with recently losing a few pounds, it swallowed me and was unwearable; so I took it apart..... keeping the zipper intact..... taking larger seam allowances then putting it all back together.  It's one of my favorite items to wear now.  You can see the original skirt's post here
And in this hot, miserable, muggy, dry..... and did I say HOT!.... South Carolina summer..... my liriope is about the only thing doing well.
Happy Sewing Everyone!  :)

8.11.2016

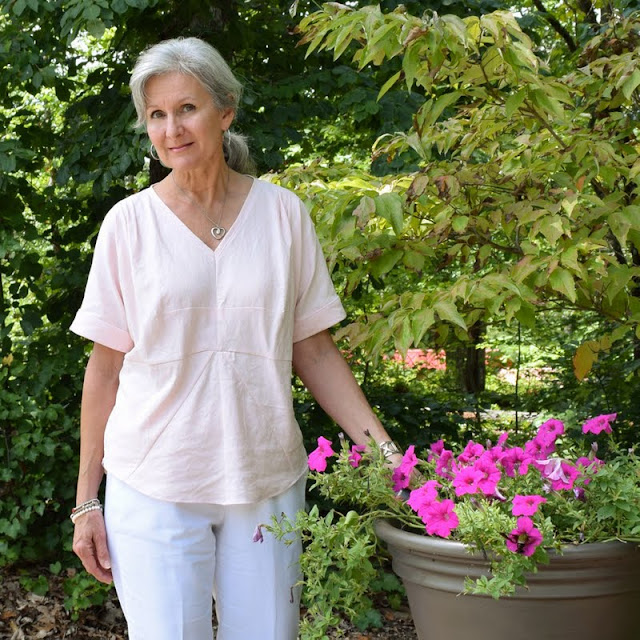
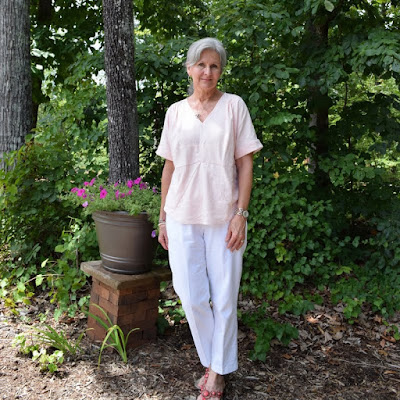
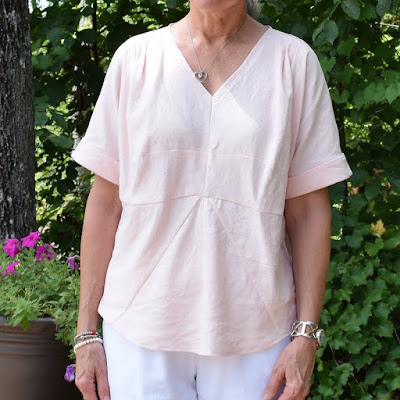
Vogue 1247 Rachel Comey top in blush Peach Linen

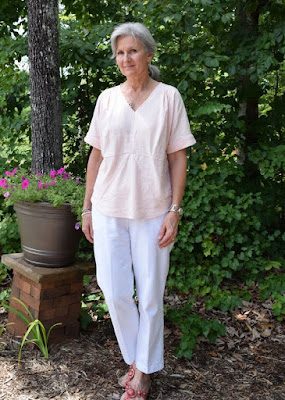
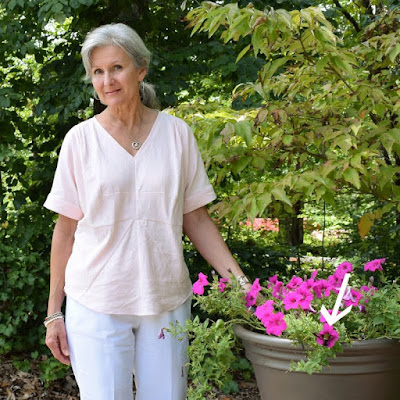
Do you ever have a pattern that occupies your mind until you make it and get it all out of your system?  Rachel Comey's beautifully designed slouchy top Vogue 1247 was that pattern for me and until I sewed this version in pale peachy linen, it just would not leave me alone.  Now I find peace and quiet as I wear my pretty new top.  And a special little visitor wanted to be part of my photo for you today.  Look carefully at the flowers to see my little photo-bomber.  :)
My first version of this top was made in 2014 out of a rayon challis with beautiful drape but was oh-so-large and sort of swallowed me, even though I made the correct size as per the pattern measurements.  This pattern runs big, but then it IS supposed to be a slouchy top, right?  So with this version I made all the modifications that had been swimming 'round in my head since the 2014 version and feel I was successful in keeping the slouchy top look, yet creating a better 'fit'.
May I say I absolutely did not like the way this top was looking during its construction.  The linen did not drape as fluid as the rayon challis and with this solid color felt I was going to be looking more like a 'vet tech' than the woman with the lifestyle I lead.  Seriously.  I almost quit, but since I'm not a quitter plugged on and now am glad I did. 
Vogue 1247 is a great pattern for both the top and skirt.
This top is completely customized to me.  Beginning with my previous traced size 10 pattern from 2014, I re-traced a size 6 under the arms tapering to a size 10 at the waist.  At the top of the shoulder I cut to about a size 8.  The hem was re-drawn to a more gentle curve.  Did my own thing with the neckline facing.  Between the way the neckline facing was applied, coupled with cutting off the shoulder top a little, it seemed to raise the V-neck enough so it's decent to wear without a cami/tank underneath and no gaping at all.  Nice. I added the sleeve cuffs to this one and really, REALLY like them.... a lot.  :)
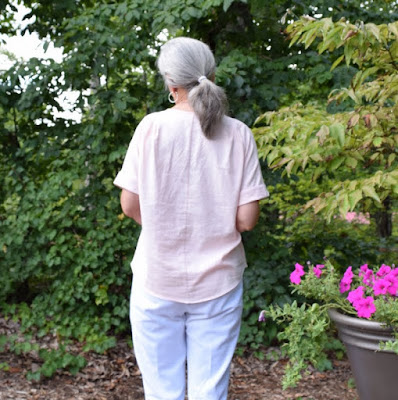
Oh, I also pinched in a little, maybe 1", at the center back neck tapering to nothing.  All seams are french seamed.
Love, love, love the white Ottobre twill pants with this top.  Feels so fresh and cool in spite of this horrible August heat and humidity.
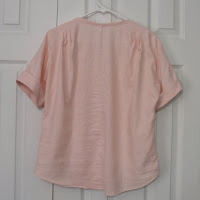
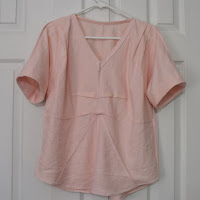
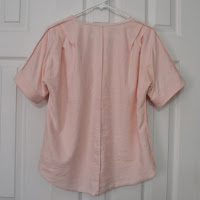
Front and back right side out.  Seams are french seams and with this bulkier linen, it was hard to get that nice convergence of lines in the middle.  But it was pretty close and I'm okay with the result.
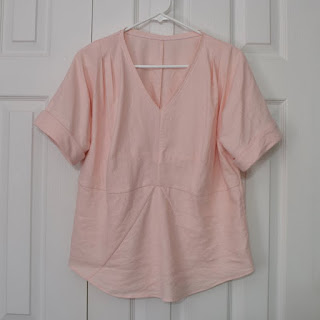
Front and back wrong side out.  The hem was serged and turned up.  Fabric purchased at Wal-Mart on clearance for $1.00 per yard.  I've never seen linen at Wal-Mart before and was shocked!  In a good way.
I am very happy with my new top!
Oh, and that special visitor was a Clearwing Hummingbird Moth!  I shared a photo of this beauty on Instagram  a few days ago and thought I'd show a different view in this photo below, on my zinnia.
And in case you needed help finding my special friend on the petunias today, I've pointed her out below.  Can you believe the timing of this photo?!!!  These Hummingbird Clearwing Moths are quick and fast and it was pure serendipity to capture this photo!  Squeal!!  :)
Happy Sewing Everyone!

8.03.2016

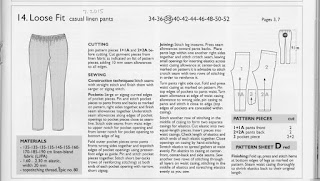
7th pair of Ottobre 02/2015, no. 14 Loose Fit Casual Pants

Seeing all those oh-so-cool summertime white pants out there, and realizing I had none, turned to my tried and true (TNT) Ottobre no. 14 Loose Fit Casual Pants pattern from the Ottobre Design Woman 02/2015 issue and completed my 7th pair.
I've got another top planned to go with these, but in the meantime the asymmetrical Ottobre 02/2015 no. 10 Sculpture out of a pretty turquoise knit suffices.
This top is supposed to sort of hug your hips to create gathering at that area, but between the loose knit  and losing a little weight, it sort of slides on down.  But that's okay.  I like it like this too.
Okay, let's talk about the pants.  This is an elastic-waist pants pattern with side seam pockets from the Ottobre Design Woman 02/2015 magazine made from 100% white cotton twill purchased from Wal-Mart.  You can buy back issues from Ottobre's Etsy shop here.  Ottobre does not support my blog in any way, I just happen to love her designs and they tend to fit me well.
Such a simple pair of pants to make.  I do not construct the waist band as per instructions.  Instead I've always used 1 1/2" elastic and turned down the casing 2" to accommodate. Oh, but be sure to use the heavy duty elastic for heavier woven fabric like this.  Ask me how I know....!   Anyway, I've made this pattern so many times, I don't need the instructions anymore.  Which is kind of cool.  Not even for the pockets. :)
Wanting to try something a little different, I made this pair with a slit at the hem.   Not having instructions at hand, thinking that process through made my head spin!  But I like the finished look.  Here you can also see the back view.  I did not do the full butt adjustment on this one.  It seems my exercise routine is helping pattern fitting issues.  :)
You can see the hem detail a little better here below.  You can also see a little of the topstitching I did on the outside seams...... another little detail I've added to the last few pairs that are different than the pattern instructions, but one I would not not do now.  May I say how ridiculously happy I was with this slit hem result. ;)
After making the entire pair of pants, the pockets really, really bugged me as you could see them sort of bulging through my white twill fabric.  Thinking ahead, I'd made the pocket bags out of 100% soft white quilting cotton to reduce bulk, but it was still not working for me.  So I decided to shorten the pockets and cut off the 'bulging' part as you can see below.  I made an angle and wheel traced it to both pocket bags, so they'd both be even, then cut them off and re-serged that area.  Super happy with the results.  Also, in the photo below, you can see the construction of the simple elastic-waist and the channel area I leave open at the side seam for the elastic insertion.  I've gotten to where I do not close this up when completed just in case I might need to go in and shorten my elastic someday.  Positive thinking, right?!
Hemmed my usual 1 1/4" hem.
These were not narrowed, as a few of my previous pairs, as I wanted the fuller, almost semi-cropped look.
Methinks these will get lots of wear, even though summer is more than halfway over here in South Carolina.
You can view pair #1, #2, #3, #4, #5, and #6 by clicking on their corresponding numbers.
Happy Sewing Everyone!  :)
Related Posts Plugin for WordPress, Blogger...