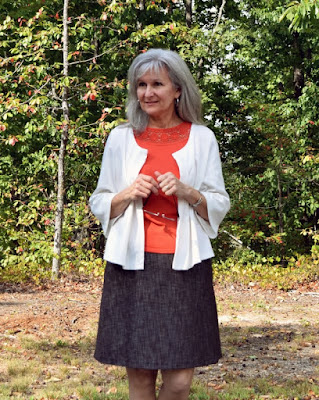
Doesn't everyone need a textured charcoal gray skirt in their wardrobe? Absolutely! And now I've got one too!
New Look 6192 has always been my go-to pattern for an elastic-waist skirt that doesn't scream "elastic-waist skirt" when worn and unfortunately looks like it is now out-of-print. Can't get any easier than 1 pattern piece.... yes 1 (one!)!..... that serves as both front and back. Seriously. This skirt runs a little short and I've always made view B. You can see #1 here, #2 here, #3 here, #4 here and #5 here. Yep, I like this pattern juuuust a little, I'd say. Guess this is skirt #6.
Made my usual size 10 in this pattern, with serged seams instead of a 5/8" seam allowance. Pockets and lining were added to the last couple of versions and did the same here. This one was also lengthened 2 1/4" to make it not quite so short.
For some reason I've always used 1" elastic in the casing waistband, and it's always worked well.
Back view shows a little elastic-waist look, but one I can live with.
Blind-stitch hemmed by machine a 1" hem. That is a feature on my machine that took a little getting used to, but now it's my go-to way of hemming a garment like this.
A classic A-line skirt that's easy to sew and easy to wear.
I am not purchasing any more ready-to-wear clothes, but am allowing myself to wear ready-to-wear clothes that I still own like this rusty orange top I am wearing today. The cream jacket is Pattern N from Happy Homemade Sew Chic by Yoshiko Tsukiori.
Happy Sewing Everyone! :)
9.29.2016
9.27.2016
New Look 6374 in Floral Rayon Challis
Here in the U.S., our first day of Fall was last week..... so of course a Summer top has been completed this week made to be worn with my white twill pants and a pair of blue Sperry shoes. Or sandals. *sigh* Someday I'll coordinate my sewing with the seasons better, but for now I'm just thrilled it's done. And I love it!
A colorful rayon challis fabric from either Hancock's or Joann's had been in the stash for a while calling my name to be a lightweight, long-sleeve summer top. Love the fluid feel of the rayon against the skin and it's a perfect fabric choice for this sort of drapey top.
Even in the mountains, South Carolina's summer temps are usually in the 90 degrees F range, but when I go in air-conditioned buildings, I freeze. So this top will be perfect for those days I'm in and out of buildings.
Back in August, our Make a Garment a Month Challenge was to choose 3 patterns from our stash and randomly pick one to sew.
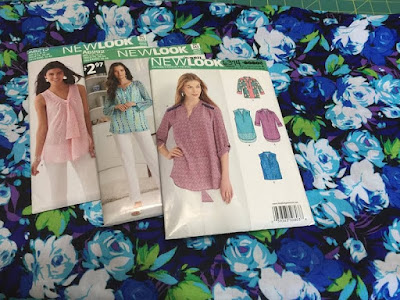
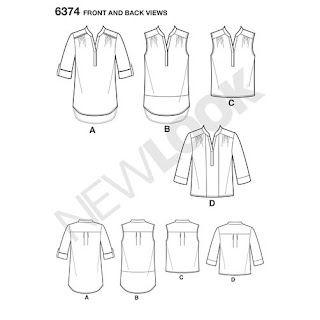
These were my selections, below. In the end, I deliberately chose New Look 6374 specifically to pair with my fabric choice to wear with my white pants that I love. I made a modified version of View A.
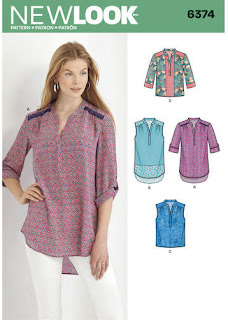
Mandarin collar with front placket are the two main design features that drew me to this pattern.
Warning, this pattern runs big and long! I cut a size 10 even though my usual New Look Pattern size is 12. I'd made this pattern before for my daughter, so was already familiar with the fit. You can read about hers here. Sarah Liz made a version here, and SunnyGal Studio's version is here.
View A is a long, long, long tunic. Mine is shortened to about the View C length, with View A's lovely scalloped hem.
The back hem is ever so slightly longer than the front and I really like the length on mine. If you scroll back up and check the model's version on the pattern, the back hem of her top hangs way down below her bottom. That is not practical for me.
Seams are serged but sewed french seams in the sleeves just because. At first I wanted to do a bracelet sort of band/finish for the sleeves, but in the end simply turned under 1/4" and hemmed. If I make this again, I may narrow the sleeves at the wrist a little. I did not want the buttoned up sleeve 'look'.
Also the placket is long, long, long. I sewed my mine closed about halfway up and can lean over with no worries. That might be another thing I change if I make this again, is to simply shorten the placket. This placket went in nice and smooth and even..... the first time! Yes! Also, again, I did not interface anything as I wanted a soft collar and placket.
And slowly but surely our woods are changing colors and transitioning to the lovely Autumnal tones even though our temps are stubbornly staying close to 90 degrees F. We are 10 degrees F above normal in temps and 5" below normal in rainfall. Our poor area is drought-stricken and I've almost forgotten what a rainy day looks like.
Fall is my favorite time of year!
So this is 'it' for Summer sewing. Already got a couple of Fall/Winter tops in process. Hmmm, wonder if this top would look less summer-ish with a pair of black pants?
Happy Sewing Everyone! :)
9.04.2016
Carolyn's Dress | NewLook 6261
The most beautiful dress I've ever made has been christened 'Carolyn's Dress'.
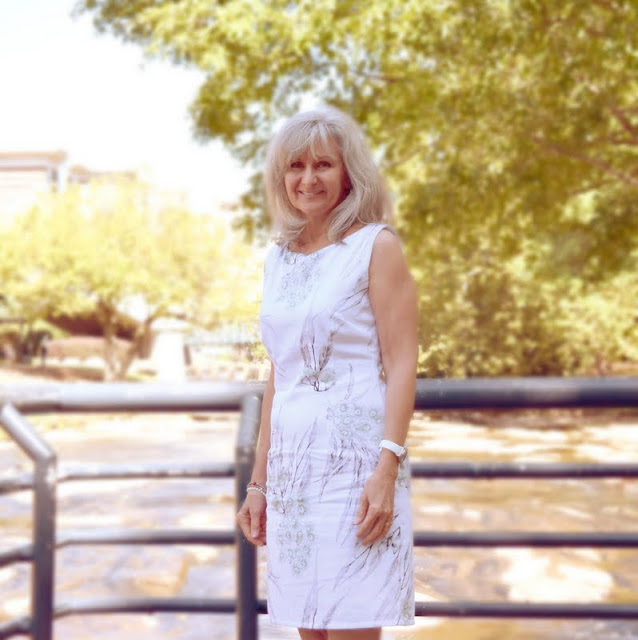
And a most special dress requires a most special backdrop, so my husband, daughter and I spent a pleasant day in Greenville, South Carolina where the landscape is undeniable beautiful and a perfect accompaniment to this lovely dress.
As this was also Labor Day weekend here in the U.S., a 3-day holiday weekend, downtown Greenville was pleasantly crowded. My husband was the best as he's not keen on photography, and particularly if there are people around; so for him to take my photos was a very big deal that I gratefully appreciate. My daughter held all the extra 'stuff' which was packed away into a bag.... that was heavy.... she's a good sport too. :)
The most lovely Carolyn, who blogs at Handmade by Carolyn, gifted me with this gorgeous rayon/cotton blend fabric printed with the gum blossom flower, a beautiful flower native to Western Australia, Carolyn's beloved home. Perth, Australia must simply be a gorgeously wondrous place to live and I love learning about her country through what she shares on her blog and ig feed. This particular friendship between two women who sew, started over a Cadbury Vegemite Chocolate bar you can read about here. :)
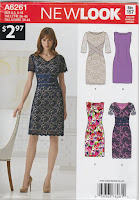
NewLook Pattern 6261 view B, short version was chosen for Carolyn's beautiful fabric to give the fabric a chance to be the 'star'. A sheath dress with bust darts and long darts in the front and back, meant this design should also flatter my figure as well as showcase the fabric well. Having never made a sheath dress before, much less this pattern before, I was way too scared to cut into my precious fabric, so it was decided to make a wearable muslin first......
....and so I made my bird dress thinking I'd work out all the kinks on this not-too-precious fabric, photo below. I made a size 14 with many modifications to customize this pattern to my figure and added little sleeves, (all info on this dress can be found here) but by the time Igot brave enough to cut into Carolyn's precious fabric was able to devote my full and complete attention to making Carolyn's dress, I had lost enough weight to affect my pattern sizing, so I now cut a size 12 and realized I had to begin from square one in customizing the pattern once again to my figure. Btw, I have come to realize, after making these two sheath dresses now, that you have to be careful where you tweak the pattern for fit, as it's very easy to create unflattering drag lines in a sheath dress. The design may look simple, but there's a lot of drafting that's gone into that pattern.
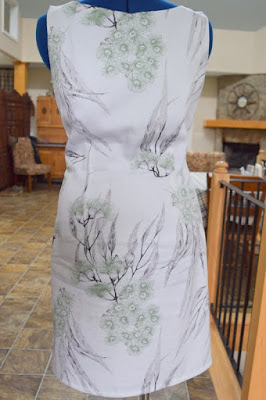
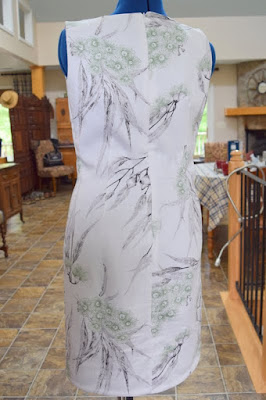
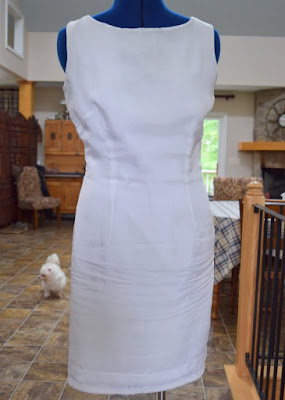
I moved forward, albeit slowly, as this new dress was begun from scratch. My notes show I began this project officially on April 14, 2016 and completely finished on August 27, 2016. All seams were basted, ripped out and re-basted, ripped out and... well you get the picture. At one point I almost took a photograph of the pile of threads on my desk ripped out in one sitting. The dress fits me much better than it fits my dress form, but wanted to show a photo of it here too. Even though I cut a size 12, I still had to take it in on each side from the bust dart up to the armhole. Waist was fine, but from the waist down I sewed a little less than 5/8" seam and from the bottom of the zip down to the hem took maybe 1/4 - 3/8" seam there. The neckline is almost like a mini-cowl on me, but that's okay. We'll just call it a special design feature. I must be quite narrow in both the front and back between my arms.
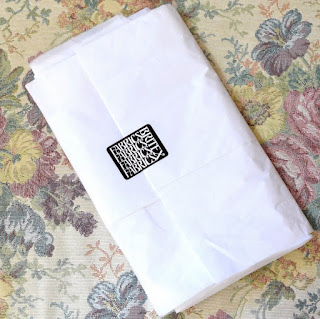
The sweet ladies of instagram helped so much in recommending lining vs. facings with rayon Bemberg lining suggested as the lining of choice. After a quick google search, I purchased White Rayon Bemberg Lining made in Japan from Britex Fabrics. The Japanese brand was a little more expensive, but I felt this dress deserved the best. Loved the way Britex's order arrived all wrapped in white tissue sealed with their logo, photo below.
I'd never fully lined a dress before, and for some reason the thought was crippling to me. The work on this dress ground to a halt as I watched videos and researched ways to line a sheath dress with a zipper finally deciding on Lucky Sew and Sew's terrific tutorial she wrote and photographed well. Let me tell you, I had her blog post saved in favorites and she has probably wondered who in the world has been viewing that page so many times! :)
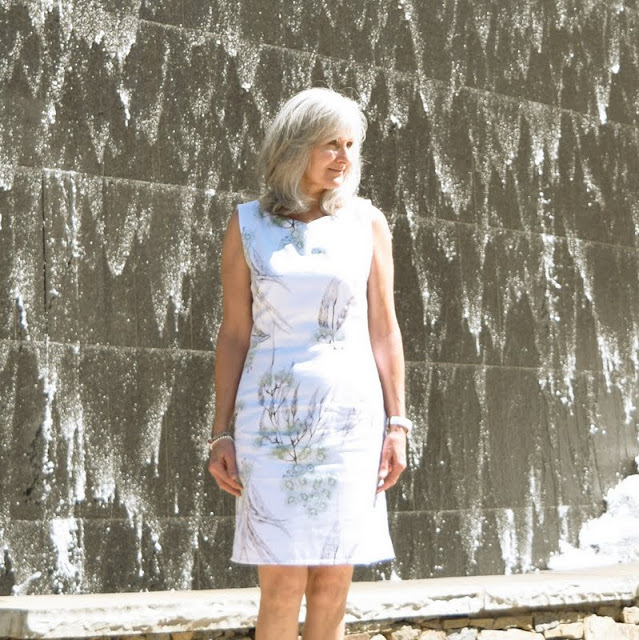
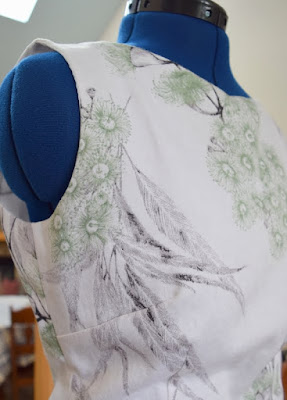
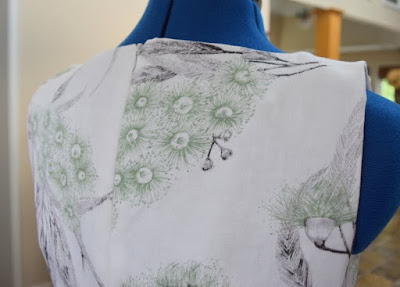
Great care and much time was spent in fabric placement. I liked the thought of these blossoms sort of cascading down the neckline as a natural 'necklace'.
And another first..... invisible zipper insertion with an invisible zipper foot. The construction ground to another halt as I decided once and for all to order an invisible zipper foot for my Bernina 1230 only to find the foot was backordered for over a month. To tell you the truth, I couldn't be upset as I was just thrilled this foot was still being made for my c.1995 machine, as many are not anymore.
Why oh why have I not bought this foot before, as immediately upon (finally!) receiving the foot, I installed a sample invisible zipper perfectly. On this dress the zipper insertion was put in on my first attempt, holding my breath the whole time! Even got the zipper tab pretty even at the top. Hard to see, but added back neckline darts from an ottobre sheath dress pattern and narrowed the top center back a little before putting in the zip.
Also, when inserting the invisible zipper to the fashion fabric.... after sewing the invisible zipper down each side of the center back seam.... to close the center back seam of my fashion fabric I began at the hem and sewed to the end of the previously sewn seams with a pin carefully pinning that seam at that point. There are no puckers in the back at all. This is an improvement for me.
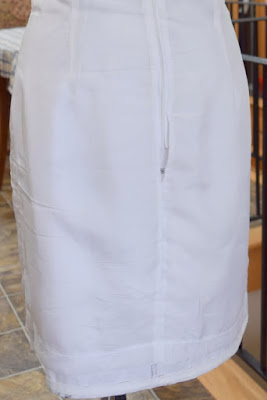
The glorious lining! May I say the lining is not only scrumptiously luxurious against the skin, but gives the dress a beautiful structure of sorts. The way the dress fit prior to lining, versus the fit after the lining was completely different. From now on linings will be sewn instead of facings, most definitely!
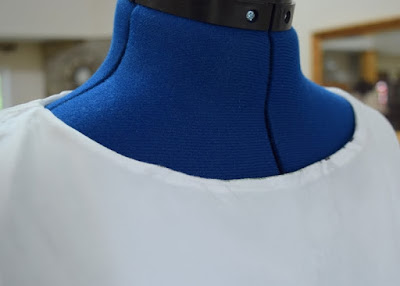
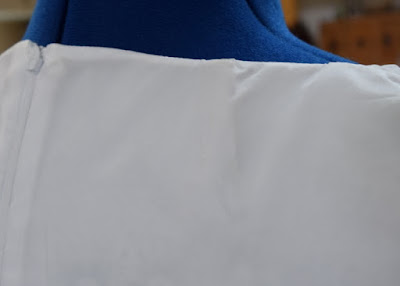
The neckline inside out. The lining was under-stitched here hoping it would help it lie nice and flat and not be shown when worn.
Per the tutorial I used, the lining was machine-stitched to the invisible zipper tape.
I was having trouble pinning my lining to fit my fashion fabric at the neckline, after having already sewn the back neckline darts in the lining, until I remembered Carolyn's suggestion to not sew darts in your lining.... simply pleat at that seam and sew. So after removing the stitches I carefully folded over and stitched and all fit perfectly.
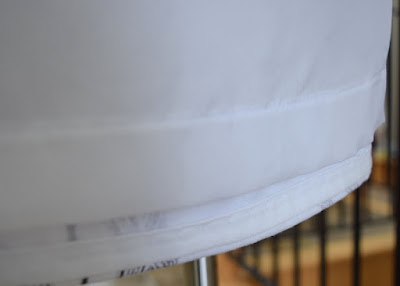
Made bias tape out of 100% white cotton in the stash to cover the serged fabric edge of the hem. All edges are serged and then the seam is straight-stitched. I did this with the bird dress and really like the way it's easy to tweak the fit, but the seams lie nice and flat and open. Anyway, back to the hem.... this dress is short enough on me without taking a deep hem and really like the way the bias tape finishes the inside nicely here. Blind-stitched the hem by machine and all of a sudden the dress was done!
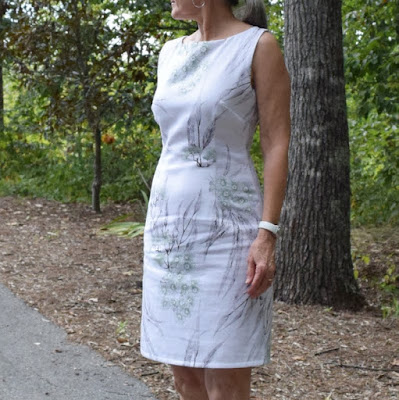
The first inaugural wearing was to lunch with my family last week, including a delicious dessert coffee all to snap this photo when I got home for posterity wrinkles and all. Such a comfortable dress!
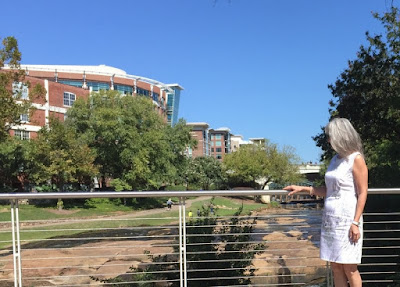
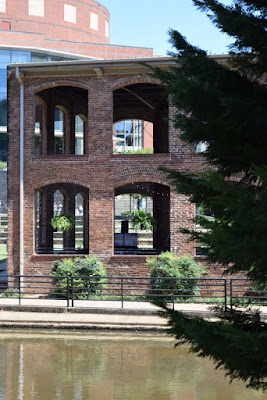
And Greenville, South Carolina! It was such a beautiful blue-sky sort of day thought you might like to see a few sights of our vibrant, dynamic town. A lovely blend of old and new with some artsy flair thrown in for good measure.
It was fun to watch the open-air Wyche Pavilion set up for a wedding. This historic building was originally the Markley Carriage Factory Paint Shop.
We ate at an outdoor restaurant near the Riverplace Bell Tower and Carillon and lucked out to hear them play at noon time.
Liberty Bridge, a pedestrian suspension cable bridge crossing the Reedy River, has become an icon for our town. "While bridges with similar structural concepts have been built in Europe, this bridge is unique in its geometry and there is nothing like it in the United States". credit here.
And of course I had to take a shot of the view of Reedy River Falls from Liberty Bridge.
What a journey this dress has been in the making! There were times the process almost paralyzed me because my confidence level waned and I so wanted to do this beautiful fabric justice. To show Carolyn how very much this fabric means to me..... how very much her friendship means to me. And when the paralysis was overcome and the project moved forward, it was such a glorious feeling of accomplishment when the dress was completed and the fit was perfect for me. I truly feel this is my best work to date. So thank you so much Carolyn! Words cannot express how much your friendship means to me.... how your work inspires me... and how much I learn from all that you share. You are a precious treasure.
Happy Sewing Everyone! :)
And a most special dress requires a most special backdrop, so my husband, daughter and I spent a pleasant day in Greenville, South Carolina where the landscape is undeniable beautiful and a perfect accompaniment to this lovely dress.
As this was also Labor Day weekend here in the U.S., a 3-day holiday weekend, downtown Greenville was pleasantly crowded. My husband was the best as he's not keen on photography, and particularly if there are people around; so for him to take my photos was a very big deal that I gratefully appreciate. My daughter held all the extra 'stuff' which was packed away into a bag.... that was heavy.... she's a good sport too. :)
The most lovely Carolyn, who blogs at Handmade by Carolyn, gifted me with this gorgeous rayon/cotton blend fabric printed with the gum blossom flower, a beautiful flower native to Western Australia, Carolyn's beloved home. Perth, Australia must simply be a gorgeously wondrous place to live and I love learning about her country through what she shares on her blog and ig feed. This particular friendship between two women who sew, started over a Cadbury Vegemite Chocolate bar you can read about here. :)
NewLook Pattern 6261 view B, short version was chosen for Carolyn's beautiful fabric to give the fabric a chance to be the 'star'. A sheath dress with bust darts and long darts in the front and back, meant this design should also flatter my figure as well as showcase the fabric well. Having never made a sheath dress before, much less this pattern before, I was way too scared to cut into my precious fabric, so it was decided to make a wearable muslin first......
....and so I made my bird dress thinking I'd work out all the kinks on this not-too-precious fabric, photo below. I made a size 14 with many modifications to customize this pattern to my figure and added little sleeves, (all info on this dress can be found here) but by the time I
The sweet ladies of instagram helped so much in recommending lining vs. facings with rayon Bemberg lining suggested as the lining of choice. After a quick google search, I purchased White Rayon Bemberg Lining made in Japan from Britex Fabrics. The Japanese brand was a little more expensive, but I felt this dress deserved the best. Loved the way Britex's order arrived all wrapped in white tissue sealed with their logo, photo below.
I'd never fully lined a dress before, and for some reason the thought was crippling to me. The work on this dress ground to a halt as I watched videos and researched ways to line a sheath dress with a zipper finally deciding on Lucky Sew and Sew's terrific tutorial she wrote and photographed well. Let me tell you, I had her blog post saved in favorites and she has probably wondered who in the world has been viewing that page so many times! :)
Great care and much time was spent in fabric placement. I liked the thought of these blossoms sort of cascading down the neckline as a natural 'necklace'.
And another first..... invisible zipper insertion with an invisible zipper foot. The construction ground to another halt as I decided once and for all to order an invisible zipper foot for my Bernina 1230 only to find the foot was backordered for over a month. To tell you the truth, I couldn't be upset as I was just thrilled this foot was still being made for my c.1995 machine, as many are not anymore.
Why oh why have I not bought this foot before, as immediately upon (finally!) receiving the foot, I installed a sample invisible zipper perfectly. On this dress the zipper insertion was put in on my first attempt, holding my breath the whole time! Even got the zipper tab pretty even at the top. Hard to see, but added back neckline darts from an ottobre sheath dress pattern and narrowed the top center back a little before putting in the zip.
Also, when inserting the invisible zipper to the fashion fabric.... after sewing the invisible zipper down each side of the center back seam.... to close the center back seam of my fashion fabric I began at the hem and sewed to the end of the previously sewn seams with a pin carefully pinning that seam at that point. There are no puckers in the back at all. This is an improvement for me.
The glorious lining! May I say the lining is not only scrumptiously luxurious against the skin, but gives the dress a beautiful structure of sorts. The way the dress fit prior to lining, versus the fit after the lining was completely different. From now on linings will be sewn instead of facings, most definitely!
The neckline inside out. The lining was under-stitched here hoping it would help it lie nice and flat and not be shown when worn.
Per the tutorial I used, the lining was machine-stitched to the invisible zipper tape.
I was having trouble pinning my lining to fit my fashion fabric at the neckline, after having already sewn the back neckline darts in the lining, until I remembered Carolyn's suggestion to not sew darts in your lining.... simply pleat at that seam and sew. So after removing the stitches I carefully folded over and stitched and all fit perfectly.
Made bias tape out of 100% white cotton in the stash to cover the serged fabric edge of the hem. All edges are serged and then the seam is straight-stitched. I did this with the bird dress and really like the way it's easy to tweak the fit, but the seams lie nice and flat and open. Anyway, back to the hem.... this dress is short enough on me without taking a deep hem and really like the way the bias tape finishes the inside nicely here. Blind-stitched the hem by machine and all of a sudden the dress was done!
The first inaugural wearing was to lunch with my family last week, including a delicious dessert coffee all to snap this photo when I got home for posterity wrinkles and all. Such a comfortable dress!
And Greenville, South Carolina! It was such a beautiful blue-sky sort of day thought you might like to see a few sights of our vibrant, dynamic town. A lovely blend of old and new with some artsy flair thrown in for good measure.
It was fun to watch the open-air Wyche Pavilion set up for a wedding. This historic building was originally the Markley Carriage Factory Paint Shop.
We ate at an outdoor restaurant near the Riverplace Bell Tower and Carillon and lucked out to hear them play at noon time.
Liberty Bridge, a pedestrian suspension cable bridge crossing the Reedy River, has become an icon for our town. "While bridges with similar structural concepts have been built in Europe, this bridge is unique in its geometry and there is nothing like it in the United States". credit here.
And of course I had to take a shot of the view of Reedy River Falls from Liberty Bridge.
What a journey this dress has been in the making! There were times the process almost paralyzed me because my confidence level waned and I so wanted to do this beautiful fabric justice. To show Carolyn how very much this fabric means to me..... how very much her friendship means to me. And when the paralysis was overcome and the project moved forward, it was such a glorious feeling of accomplishment when the dress was completed and the fit was perfect for me. I truly feel this is my best work to date. So thank you so much Carolyn! Words cannot express how much your friendship means to me.... how your work inspires me... and how much I learn from all that you share. You are a precious treasure.
Happy Sewing Everyone! :)
Subscribe to:
Posts (Atom)

