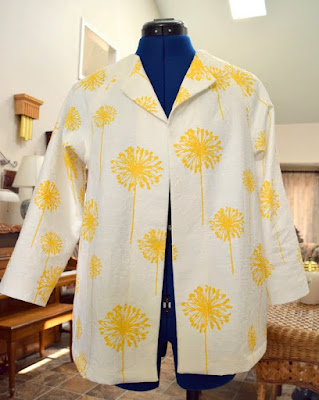
There's something about a dandelion in its full seed state that captures one's imagination in the same manner my lovely fabric captured mine.
You may remember the Dandelion fabric purchased a few months ago from All About Fabrics, a fabric textile outlet in Williamston, South Carolina. All About Fabrics only sells to the general public 3 days each month at their store, but I found the very same Dandelion print fabric online at Fabric.com and they have plenty in stock. Hmmm, their care instructions says 'air dry only'.... I've already washed mine in cold water in the washing machine and dried in the dryer and all turned out well.
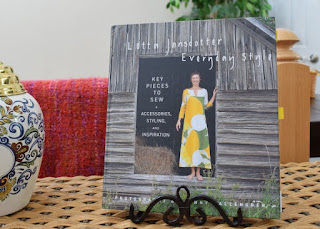
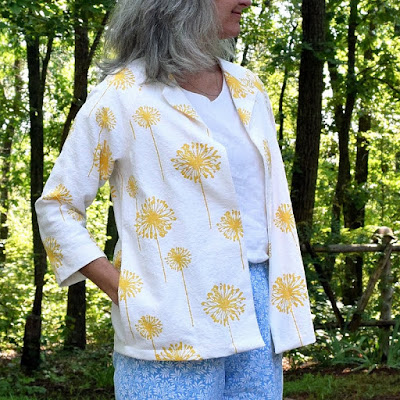
When I first saw this corn yellow dandelion screen print on cotton slub duck, I immediately knew it would be a Pilvi Jacket from the book Lotta Jansdotter Everyday Style. If you click on the book's link, it takes you to Lotta Jansdotter's website where you can see photos of the jacket and her other designs.
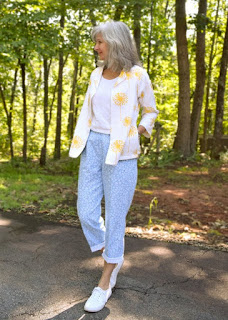
Such a cute jacket! The Pilvi is a raglan sleeve unlined jacket in either a short jacket version or a long jacket version. I tacked the top corners down to give it a 'collar' look.
I wanted a car coat length that was somewhere in between the short and long version..... so that's what I made. Used about 1 1/3 yards of 54" wide fabric. Hardly any scraps left over at all. :)
My measurements were a solid Small at the time, so that's what I sewed with no fitting modifications. In hindsight, I sort of wish I'd cut an X-Small in the bust and waist grading to a Small at the hips. Anyway, a boxy jacket with the option of sewing down the top two front corners of the jacket into a sort of 'collar point'. Which is what I did. 1/2" seam allowances are included in the pattern. Nice!!! She also has you top-stitch all the facings down which I also like.
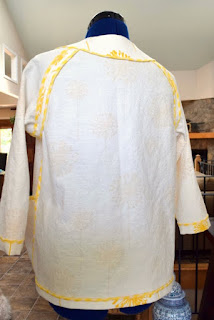
Definitely see the boxy shape in the back. I really like the 3/4 length sleeves. A lot!
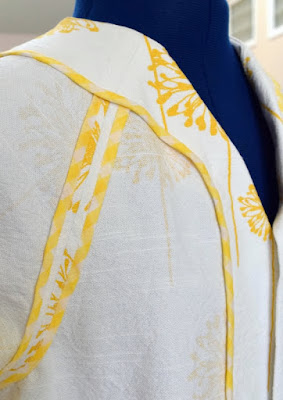
I also top-stitched the raglan sleeve seams.
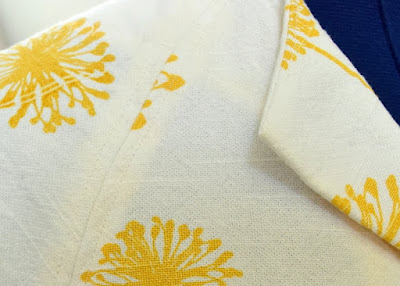
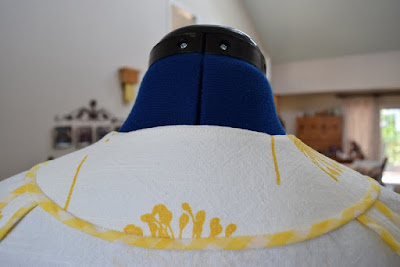
Just so hard to see the white on white. She does not have you understitch the neckline facing, but I did, as you can see a little of the seam here. That's just one of those things you really might want to do regardless of what the pattern instructs. The neckline 'collar' is tacked down with white button craft thread that totally blends in with the fabric and I like this so much more than using a 'button' or some sort of ornament. Think it makes my jacket look like a sort of 'collared' jacket, without the collar.
When making an easy project, like this one, I like to work on skill sets that may be new to me..... so this project was all about hong kong seams and enclosed seams using a piece of yellow gingham that had been in the stash for as long as I can remember.
Don't you just love the yellow gingham against the yellow dandelions?!
This jacket was an utter joy to make!
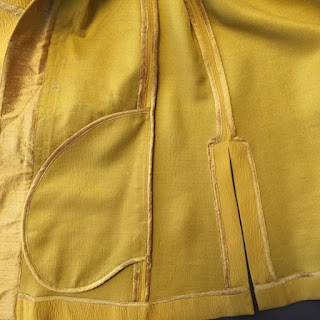
With the exception of how to enclose the pockets with hong kong seams. That was a head-scratcher for me and I simply could not figure out the mechanics at all. A quick Google search turned up a photo of the inside seams of the gorgeous Vogue 1493 Koos van den Akker Kimono Jacket .....
 |
| Photo Credit: Vogue 1493 |
 |
| Photo Credit: Vogue 1493 |
| Photo Credit: Handmade by Carolyn Trench Skirt <3 |
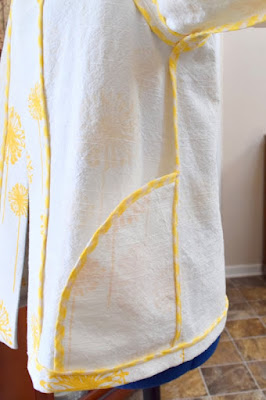
Trying to show a little mini-tutorial of what I did.... I serged the front pocket bag to the front side seam, then hong kong seamed the back pocket bag to the back side seam. This is because the 'back' of the pocket bag side seam is what will show when completed and I wanted to reduce bulk. This is the point I'm at in the photo below. Pin everything together and sew an enclosed seam binding beginning at the jacket's sleeve edge, around the raglan sleeve seams all the way down and around the pocket bag in one fell swoop.
Pin carefully around the pocket bag but you can do it.
You can see a little crease at the top of the bend of the pocket bag. I treated this turn sort of like I would treat the edge of binding a quilt. It's funny how the two crafts overlap sometimes. ;)
I also used a smaller pocket bag pattern that would fit my car coat length better. Lotta Jansdotter's pocket pattern is huge and would make fantastic pockets in the long coat version but would've overwhelmed my little coat. Also note how I tucked the bottom of the pocket in the hem. Thought this would anchor everything well.... and it does.... sort of. The pockets flap a little more than I prefer so am considering going back and top-stitching them down.
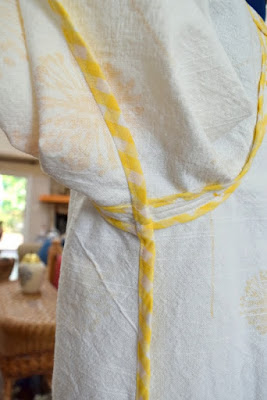
Really like the neatness of the underarm area. Top-stitching the raglan sleeve hong kong seams down was huge in adding to the neatness here.
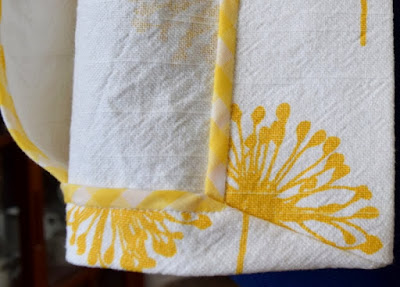
The jacket's instructions have you sort of turn up the jacket's bottom corner and I just really did not like the way that looked on my jacket. So after fooling around with it for a bit, came up with a mitered corner application that methinks looks quite nice and neat. Even was able to match up the hong kong seams here!
Something about working with such a 'happy' fabric and learning new skills combined to make a perfectly enjoyable project.
Couldn't help snapping this photo of one of our fields we'd neglected to mow where the dandelions have completely taken over!
I'm wearing the Ottobre no. 10 Sculpture white linen top and the Ottobre no. 14 Loose-fit pants with the new jacket today.
Happy Sewing Everyone! :)











This is so pretty, Lisa! I don't know wether I like more the outside ore the lovely inside! The dandelions are so cute but the inside is so neatly finished! Thank you for your tutorial. I like the quilt-binding-like corner. The mitered corner is the perfect solution and I love the pockets enclosed in the hem! You
ReplyDeleteLisa, this jacket is beautiful. I love it. love the fabric.. Happy sewing.
ReplyDeleteThank you Judy! :)
DeleteIt's beautiful, Lisa and suits you perfectly. Thanks for showing off all your attention to detail. Your pride is justifiable!
ReplyDeleteThank you so much Barbara! The longer I sew, the more I seem to pay attention to the inner finishes of my makes..... and even I'm surprised at how good it makes me feel! :)
DeleteYour work looks so, so professional, Lisa! I love the way you work with the certain design elements to change them to your own personal tastes and desires. I like to think I do the same when working with a quilting pattern. Now and then my own idea of how to do a particular step just seems so much easier!
ReplyDeleteGreat point! And yes! I think you definitely do this with your beautiful quilting!! Thank you so much Mama Pea! :)
DeleteWhat a pretty fabric and jacket. You really got me interested in that book now, and in trying a hong Kong finish, the inside of your jacket looks so neat! What a beautiful make :)
ReplyDeleteOh you really should try a Hong Kong finish as it's not difficult at all and I did not find it that much more time consuming. More of a pleasant addition to an enjoyable project. Don't know why it's taken me so long?! Thank you Katharina! :)
DeleteHow lovely Lisa! You are absolutely glowing in this gorgeous fabric. I can see why you fell in love with it straight away, I did too! and I simply cannot wait to make up something with the piece you generously sent to me. Thank you so much! xxx
ReplyDeleteThank you sweet Carolyn! And thank you ever so much for helping me through the roadblock of binding those pockets and side seams. And I simply cannot wait to see what kind of wonderfulness you make with that piece! You are so very welcome! xx:)
DeleteThis coat is just beautiful Lisa, pure sunshine and happiness inside and out - the gingham just makes this jacket - you must feel happy every time you see the insides. You have shown very clearly how to bind the pockets - they look so smart. Enyou wearing !
ReplyDeleteAs I said on IG, this is beautiful coat - inside and out. You did a great work and enjoyed all the explanation ❤❤❤
ReplyDeleteI love that coat! It looks comfy and lovely. Thank you for the details, and this post is very informative.
ReplyDeleteSuch a beautiful jacket, both inside and out. I love the gingham binding. Love your whole outfit...casual yet effortlessly stylish.
ReplyDelete