Using a spur-of-the-moment purchase of adorable red and black buffalo plaid pre-quilted fabric, this vest was supposed to be a simple, quick and easy make. Instead it became one of my biggest, head-scratcher skillbuilder projects that I am so proud of.
Both sets of construction photos captured a bit of interest on Instagram that motivated me to hang in there to the finish line. What could be so hard about making a vest out of pre-quilted material you might ask? And that would be a very good question!! It was because of the pre-quilted material that prompted me to want all seams finished perfectly. There could be no facings nor lining.... it was all about the seam finishes. And plaid placement. Took me forever just to cut the fabric out.
Flat-felled seams seemed the most reasonable choice, as well as using twill tape binding and bias binding to bind and cover all other exposed seams. That also meant I could not follow the pattern instructions. Oh, I also wanted to add in-seam pockets finished with a flat-fell seam.
So not only have I never sewn a 'real' flat-felled seam before, but have never put in an in-seam pocket using a flat-fell seam. Loads of time was spent on research just for the pocket insertion alone. And then there was the placement of the plaid design..... but I'm getting ahead of myself a little here. Let's back up and begin at the beginning.
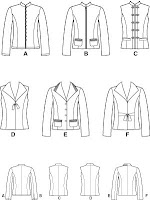
Last year I had picked up this out-of-print Simplicity 4953 pattern at my local thrift store for all of 25 cents thinking the vest and jacket combinations were pretty cute. So when I found the fabric it just seemed like a modified view C vest would be a good match. This pattern is dated 2004 and surprisingly calls for shoulder pads in the jackets, but no mention of modifying the pattern to subtract for not using shoulder pads in the vest. I made a straight size 12 with no modifications and a 5/8" seam allowance. If..... when I make it again, I'll cut a size 10 at bust grading to size 12 at hips and fool around with the shoulder area as I feel it's a little large-ish.
On a crisp fall day last September, thinking of seasonal wardrobe plans, I made a pretty large fall/winter fabric purchase at my local Jo-Ann Fabric Store, a small portion shown in the photo below. The red/black pre-quilted fabric was picked up almost as an aside. Didn't go with the tonal browns and burgundys of the color scheme going on, yet I knew it had to be mine. You can still order this pre-quilted fabric online here. Originally 16.99/yard, the pre-quilted plaid fabric was on sale for $7.99/yard and silly me thought 1 1/4 yards of the 53" wide fabric would be enough for a simple vest. Not until I began laying out the pattern and really thinking about how the plaid would work in the vest, did I realize 1 1/4 yards was going to be tight. I'm super proud I made it work, even though the collar is pieced in a couple of spots. Needless to say, there is no scraps. And that is nice!
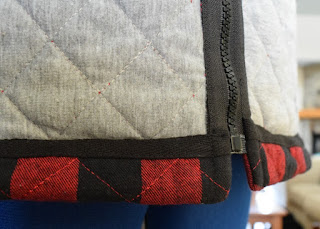
The photo of the inside-out-vest below shows how this fabric is pre-quilted with a red/black buffalo plaid woven 'right side' and a soft gray knit 'wrong side'. The batting is polyester and you need to be careful to iron on a medium heat setting. Care instructions say 'Dry Clean Only' but on the fabric bolt the fabric content is listed as polyester and cotton so I felt it was safe to pre-wash on gentle cold water cycle. It came out fine. I haven't washed the finished vest yet.
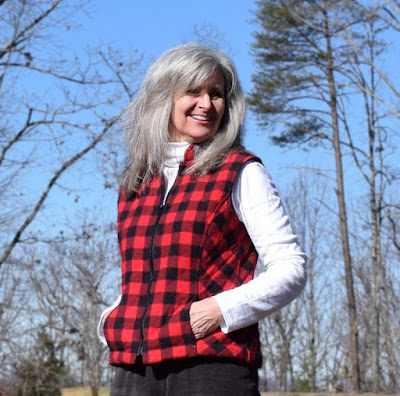
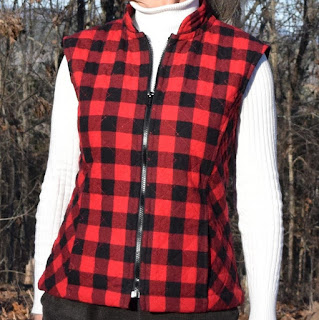
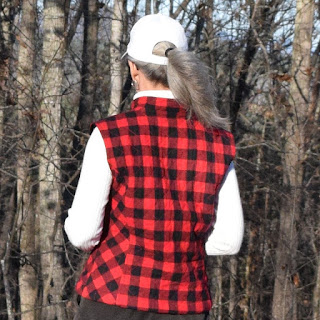
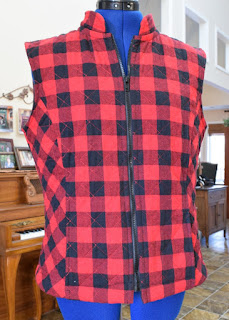
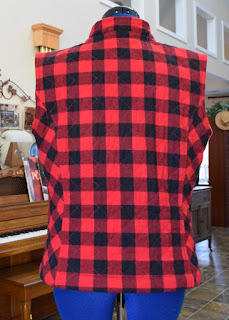
The vibrant rich colors came out a little washed in the photo below but still wanted to show you the finished front and back shots. Because of the plaid I took out the center back seam and cut on the fold. See how I centered everything up in the back..... and look at the plaid matching center front through the zip! Yes!!!!
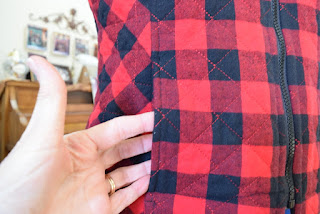
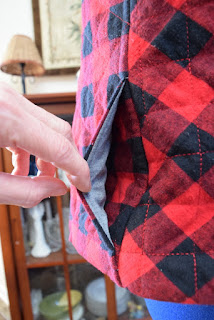
The Thread Blog at fabrics-store.com wrote a most excellent tutorial on constructing flat-felled seams with an in-seam pocket. I found it hard to find an online tutorial on this skill so am very grateful she took the time to photograph and write hers. It was easy to follow and turned out well. I'll be using it again! By the way, not sure why the pattern does not include any in-seam pockets..... only patch pockets. So my self-drafted pocket opening ended up a little narrow, but that's okay....
.....it's in and it's all good. To reduce bulk I used a piece of soft gray knit from the stash for the pocket facing.
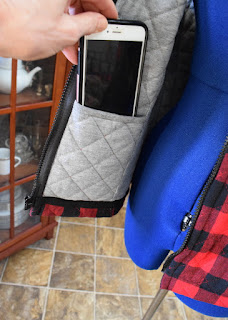
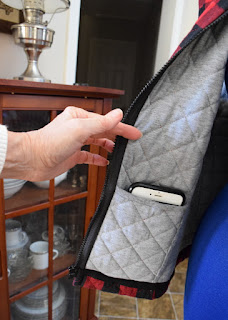
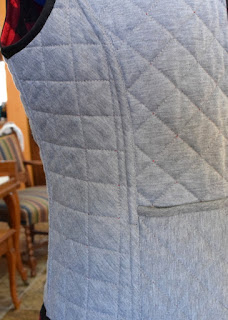
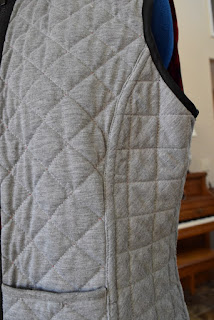
The pocket bags are anchored in the zip, hem and in the front princess seams and I even finished off the top of the pocket bags with a piece of gray knit bias binding. I seriously wanted absolutely no interior seams left unfinished. And how cool is this! Bonus interior pockets!
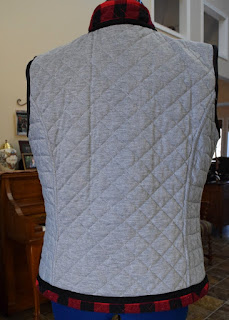
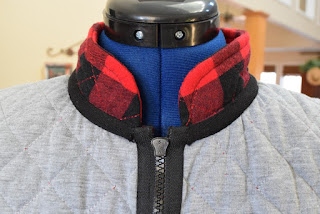
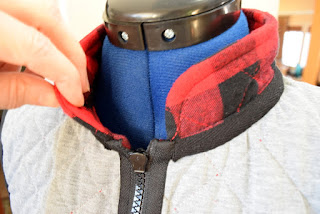
Inside out shots of the front and back. Here it's easier to see how the zip stops below the collar. I am weak in collars but, again, am quite proud of how this one turned out. Because of the sturdiness of the pre-quilted fabric, I did not use any interfacing in this collar.
1/2" Simplicity non-flexible black twill tape was used at the collar and hem, and I was a little nervous the collar would not turn out right as binding/tape cut on the bias to be a little more flexible on the collar curve really should have been used. I just really, really wanted the rugged look of the twill tape! Knowing this, I trimmed the collar seam and cut lots of clips to the seam line to get everything to stretch as best I could before applying the tape. It seemed to work well.
Extremely proud of the flat-felled seams! I was nervous to snip the princess seams curved seams, so flat-felled them without snipping and think it all looks great.
For some reason where the collar and zip met gave me pause. I just could not wrap my head around how to finish all this off. There was such anxiety, a special trip was made to JoAnn Fabric Store to purchase a couple of different sizes of Coats and Clark Separating Sport zippers where it was determined a 20" was perfect. After all that...... I cut the twill tape a little short.....
.....but am happy with the way the zip tape is all tucked in. Also added top stitching to the collar. Top-stitching is also good methinks.
After realizing the twill tape had no stretch on the collar, I made my own black bias binding to finish the armholes out of a piece of bemberg/polyester/satin-ish stuff. Not wanting a 'shiny' finish, I simply used the 'wrong side' as the 'right side'. Am thrilled with the way this turned out all nice and neat as this is another area I'm weak in.
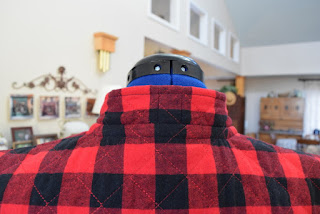
Showing how the back of the collar is pieced.... but also pretty proud of the plaid placement here too. Paid great attention to detail in this 'simple' project!
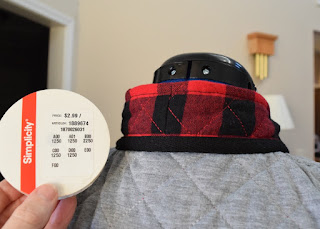
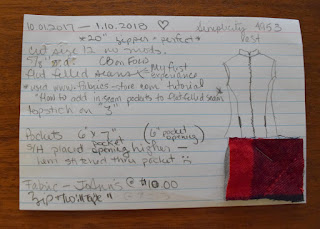
Thought it'd be fun to share a copy of my notecard kept on this proejct. I keep a notecard just like this on each and every project I make as it is most useful to refer to when making a similar project.
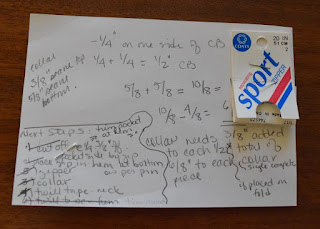
And what was unusual about this one... is that at one point, late at night, when I'd finally figured out which step of construction to do when.... I made myself a little list to check off so I wouldn't forget!!
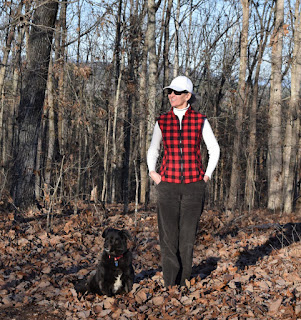
And couldn't close without showing how Suzi and I matched this day. Her collar is actually red. Hmmmmm, these pants look baggy and bad and seem to make my legs look larger than they are. What is going on here?!!! Have you ever found that what you 'think' looks all fine and dandy, just really might not look so great after looking at photos of yourself!
And here's a quick look at an upcoming project that's almost ready to share.
Whew! So that closes out this little simple, quick and easy project (Ha!) and I'm ready to make another vest with a few modifications. It's been great fun learning all these new skills and am looking forward to applying them to future projects.
Happy Sewing Everyone! :)





Your vest turned out beautifully Lisa! Well worth all the extra effort and it was a great project for building on your sewing skills.
ReplyDeleteThank you so much Jean! I like to take these seemingly 'simple' projects to work on skillbuilding....just had no idea how much this one would take! Ready to tackle another project now! :)
DeleteLovely work, Lisa. You have every reason to feel proud.
ReplyDeleteThank you so much Kathy! It's good to see you again!!! :)
Deleteso much detail, well done you!
ReplyDeleteThank you so much!!! :)
DeleteThat was a fun read! Thank you Lisa! I loved reading about your problems and solutions! The vest looks super professional and solo neat. Great job, you should be very proud, you have mastered so many obstacles with this one :)
ReplyDeleteI have that situation quite often where I am surprised how I look in pictures :D I've learned not to care that much. And for what it's worth I think the pants look fine, they look a little wider, but they don't make your legs look bigger!
Your posts are always such a fun read and that is such a kind thing of you to say. Ah, okay, you definitely make me feel better to think the pants look wide, but not the legs! Thank you so much Katharina! :)
DeleteWhat a beautiful vest! It looks lovely on you. I especially love the placement of the plaids. I'm just making a quilted-coat, the post is really helpful. Thank for showing the details.
ReplyDeleteThank you so much Eli! What a nice compliment! I look forward to seeing your new coat!! :)
DeleteThank you so much!!! :)
ReplyDeleteGorgeous vest! Sometimes it's fun to lose yourself in a project rich in fiddly bits :) especially when it turns out so beautifully! I have found some real pattern treasures in thrift shops too :)
ReplyDeleteGreat point! This was an enjoyable project to lose onself in with great reward at the end! Thank you so much Kathleen! :)
DeleteThat‘s the perfect vest, Lisa! I loved reading your story of your way through this project with all the interesting details! :)
ReplyDeleteThank you so much SaSa!! It felt great to finally be at the point to get all the details down on paper..... or rather in a post. :)
DeletePerfect vest, Lisa. Well done! I love reading all the detail process, especially flat-felled seams that I never tried before. Thank you for sharing ❤
ReplyDeleteLisa, this is spectacular! Immaculate and beautifully made. Love it. As Hana said, it's interesting to read all of the making process. Enjoy wearing this beauty.
ReplyDeleteWith every garment you challenge yourself and learn more and more and more! Be proud of yourself, Lisa, for your perseverance and your ever growing sewing skills. It's a beautiful vest!
ReplyDeleteWhat an absolutely brilliant job you did on this. I love every single thing about it, it's just gorgeous.
ReplyDeleteThis did turn out beautifully. So well worth it to pay attention to details - it's always wonderful to wear a garment that you made knowing that is is so nicely finished.
ReplyDelete