12.07.2012

'Whooooo' doesn't love owls!
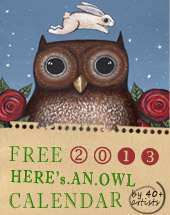
A free 2013 owl calendar to print.

The blog world is a wonderful place to find and share inspiration and how exciting for me to stumble across Going Home to Roost's post leading to My Owl Barn's free downloadable printable 2013 owl calendar.
With Christmas fast approaching and trying to pull together small, unique items for gift-giving baskets, how exciting to see this cute adorable owl calendar..... and it's free!  Click here will take you directly to the calendar site.  What is really neat, is that it features owl renditions from 40 artists from all over the globe and, as we all know with our calendar year having only 12 months, there's plenty of owls to chose from. So simple, using a drop-down menu to choose which owl you'd like for which month. Click download and there you've got it.  It couldn't be more easier or more customizable. 
Owl Lover 2013 Calendar
I printed mine on 110# white cardstock paper.  Aren't they cute?!  I tried to chose artwork to go along with that particular month's 'season'.... 
Easy to cut out using a papercutter.  Just line up the printed cut line with your cutter's blade....
All cut out and in the right order...
This is where I added a paper wrapper.... to hold the little pages together.  It can be found by clicking here...
 Cut those out....
Line it up... 
...carefully 'wrap' then tape...
All done!
I will include the cover sheet and artwork credit provided by My Owl Barn as well as a little magnetic barrel clip with each calendar.
This was an easy and fun project to pull together and will make perfect Christmas gifts.  Thank you so much My Owl Barn for providing such a nice little calendar for free and thank you Going Home to Roost for sharing the information. 
~Lisa
Pin It

10.31.2012

a Needle Felting Tutorial::
Pumpkins!

Aren't these little pumpkins adorable!  An enjoyable afternoon was spent needle felting with my daughter and I wanted to share this easy project with you.
Needle felting is a simple fiber arts technique of manipulating fibers with a felting needle and using your creative imagination.  It's an oh-so-easy, fun and quick project to create.
 
Supplies needed are: 
  • magazine (to protect your table top)
  • thick sponge
  • craft stick
  • needle felting needle (I ordered mine years ago from Deb Potter @Merciful Hearts Farm)
  • wool fiber dyed to color of choice  (in this case Kool-aid orange for our pumpkins)
  • ordinary green felt cut @1 3/4" x 1 1/2" for our pumpkin stems

First, let's look a little closer at a felting needle, photo below.  It comes in a protective sleeve, shown here at the top right.  It's about 3 1/2" long and straight, with a small hook at the top.
It is much larger and longer than a sewing needle, and a darning needle.
When you run your fingers down the needle, like the arrow shows below, it feels smooth.
When you run your fingers up the needle to the point marked as a white line, as the arrow shows below, you will feel the burrs, or roughness, manufactured into the needle.  This is what 'felts' your wool.
Okay, let's begin.
Decide how big you want your pumpkin to be and pull out that much fiber rolling it into the rough shape of a ball.  It won't stay in that shape, but that's okay.

Place your magazine on your table top, then your sponge and then on top of your sponge your wad of wool that will eventually be your pumpkin.  The sponge makes a flexible working area and the magazine protects your table from any errant needle jabs.

Move your felting needle in and out of the wool fibers randomly using an up and down motion.  Do not felt in one spot, as it will create a 'line'.

The needle only goes into the wool the depth of where the burrs are on the needle.  Check the photos above for reference - but @ 3/4" from the bottom of the needle.  The craft stick can be used to hold the fiber in place as you felt with your other hand.  After I got the hang of it, I was able to put my craft stick away and use my fingers - always conscious of where my felting needle was going.
In the photo below you can see a round shape is beginning to take shape.
Now it looks nice and round here.  But it's not as big as I wanted it to be.....
...so more fiber is pulled from my little stash and wrapped over my ball....
...needle felted right onto the ball.... remember to move your needle in and out randomly...
...now it's the size and shape I wanted.  You cannot tell where any fibers were added.
Felt to the density you want .  The more felting, the denser the object will be.
Let's work on the pumpkin stem now.  Using a pre-purchased green felt sheet from a fabric store, cut @1 3/4" x 1 1/2" piece.  Notice I'm still using the magazine with the sponge on top.
Fold the green felt into the shape you desire for your stem.  I double-folded mine.
Then felt it closed.
See why you need the sponge.  The fibers actually go into the sponge with each needle action as the fibers are felted.  I felted my entire green felt piece, turning and moving constantly as I wanted a more elongated stem shape.
Now we want to attach our stem to our pumpkin.

Place the stem at the top of your pumpkin shape, and felt it into the pumpkin by moving your needle in and out of the bottom of the stem and into/through the top of your pumpkin all 'round the bottom of the stem.  This will attach the stem to the pumpkin.  Keep felting this way until it has the 'look' you want.
We're ready to begin making our round orange ball look more like a pumpkin.

Needle felt in a straight, perpendicular line over and over your 'line' and it will create an imprint like a pumpkins.  I did 6 of these lines.  Again, the more felting done, the denser the project will be.
My little pumpkin is complete.  A little hard to see my 'pumpkin lines', but they're there.  Also, see how I felted the little green stem to give it a curvature.  From start-to-finish this took approximately one hour.
Placed with the other felted pumpkins we've made on our mantel.
Each pumpkin looks different.  Some more round than others.... some more dense than others.... but that's okay because that's what creativity is all about.
I hope you enjoyed this little needle felting tutorial and will try a needle felting project.  Deb, from Merciful Hearts Farm, has a blog that is fun to read about her family's life on their farm.  Click here to read.  She has supplies for sale and is a very talented fiber arts artist.  She is also a very nice person.   This project was adapted from one of her fiber arts lessons from years ago.  The wool I used was given to me as an entire sheep's fleece from a friend of mine that I cleaned and hand-dyed using orange Kool-aid.
~Lisa
Pin It 


Linking to:
sew many ways
Tuesdays at Shwin & Shwin
Sew Can Do Craftastic Monday Link Party


6.05.2012

another trinity stitch prayer shawl completed
~ a little wider this time ~

Remember this humble beginning in February 2012?

The ugly duckling knitted into a beautiful swan...
Using the trinity stitch pattern, modifying it to complete at a wider 45" width, this yarn worked into a beautiful striped pattern on its own.  The 38" wide original trinity stitch pattern casts on 87 stitches, so wanting a wider prayer shawl to be approximately 45" in width, I cast on 99 stitches on my size 13 needles.  It worked like a charm!
The only 'problem' with this yarn, is that I had to match the beginning of each skein to the knitted colorway, so I was glad I'd purchased a few extra skeins to have some choices.  This shawl used a total of 5 skeins, including the fringe.  I used the same yarn for the double strand of fringe 10" long. 
A peek into my Ravelry notes:
May 25, 2012 ~ this shawl completed at 45” x 64” and only used 5 skeins of yarn, though I originally projected it needing 7. I was glad I’d purchased extra as the ‘striping’ had to be matched when beginning with a new skein and it was nice to have a few to choose from, as each skein began/ended with different colorways. It was fringed with double strands of the same yarn as the shawl, measuring 10” finished length of fringe. The fringe really adds to the overall prayer shawl. I like this new wider width as it’s more like a ‘throw’ instead of a ‘shawl’.
This prayer shawl was knitted for my cousin, Dorothy, who cares for her live-in elderly mother-in-law, who has advanced Parkinson’s and needs round-the-clock care. When I spoke with Dorothy last week, hospice had been called in for her MIL and she was only expected to live maybe a few weeks. At the time she (her MIL) will probably pass away at Dorothy’s home. This news pushed me to box and ship the prayer shawl that very day to Dorothy.
Sometimes the caregiver can be lost in the needs of the patient and I wanted Dorothy to know that I love her and prayed for her to have the strength, patience and wisdom to care for the extreme needs of her MIL.  My hope, is that she will feel strengthened by God’s will and love as she is embraced by this humble shawl.
~Lisa
Pin It

5.29.2012

a throw for a friend's birthday


Who doesn't love the soft cuddliness of polar fleece?  Even though it's already hitting 90 degrees in the beginning of our Southern summer, air conditioning can be chilly enough to enjoy having a throw on hand.
My friend Lynne is special.   With our children close in age, we've known each other many years, sharing in our children's 'growing up' times.  She lives in the country too and raises 'oreo cows'... Belted Galloways.  She loves her cows....
....and they love her.
You can read more about our fun 'girl's day out' by clicking here.
Knowing blue is Lynne's favorite color, when I saw this polka-dot blue polar fleece, it immediately made me think of her.
Using the Oh-so-easy Polar Fleece Throw with crochet edging pattern, it was completed in a short time. 
The 'front'....
Turning the edge under as I crocheted over it was the only modification I made to this pattern and can be seen in the photo of the 'back' below....
A handmade card and decorated envelope completed her gift package...
Even though this was a simple birthday gift for my dear friend, I still prayed for her as I worked on her throw and let her know how much I treasure our friendship.
~Lisa
Pin It