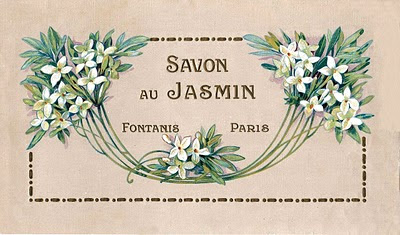
Below, is what the Graphic Fairy's Paris Soap Label image looks like as an 'image'. Click on her link to download. She also includes instructions on how to download the images. Her sight is truly an amazing sight. I've also got her link in the sidebar to the right. For a novice like me, I really appreciate all that she offers and it's all at no charge. Thank you Karen.
Did you know 'Savon au Jasmin' translates to 'Jasmine Soap'? I didn't, so my sweet daughter researched it for me/us! I believe Fontanis is also a town. I thought this was just a simple, lovely image.
Back to the little bag.... keeping the back simple, gave me an opportunity to try my hand at FMQ (free-motion quilting), so I guess I learned 2 new techniques this day. I'm usually an 'everything has to be symmetrical' type of person, so all this 'randomness' was something new to me. I liked it. It was a lot of fun being 'random'.
Lined the inside. Actually this was part of the 'quilting', and next time I think I will quilt just the batting and the top fabric, and add the lining separately 'unquilted'. I've already figured out how to improve the zipper insertion too. But this isn't too bad for a first, and with no pattern or instructions!
A pretty ribbon from my stash for the zipper pull. Actually everything came from my stash.
Let's talk about the image transfer process:
Supplies needed: Loctite Spray Adhesive, 8 1/2" x 11" cardstock paper, fabric, computer printer.
After choosing and downloading the image, I used 'Word'
to play around with the image size and location I wanted the final
print to be on my fabric. The printer will 'transfer' the image. Be sure to print it out on paper first, before using your
fabric, to make sure everything is like you want it. Following the Graphics Fairy recommendation (somewhere on her sight she talks about this product, I'm just not sure it's in the link I provided here), she recommended using Loctite Spray Adhesive and simple cardstock paper.
In a nutshell, you spray one side of your 8 1/2" x 11" cardstock paper with a nice layer of this adhesive and 'glue' your fabric piece (wrong-size) to the paper. Trim the fabric to match evenly with your cardstock, run through your printer so the 'print' will be on the fabric, gently peel the fabric from the cardstock (the adhesive is temporary), and Voila! your image is transferred to the fabric. 8 1/2" x 11" is perfect for this little bag. One word of caution, it's best to spray outside, as this is sticky and could get messy inside. I found the Loctite easily at Wal-Mart's craft department where their 'glues' were located.
One last look at the cute little bag. I couldnt' resist including my violin in this photo, as it seemed to go well with the theme. The pretty 'doily' you've seen in the background of these photos, is an antique hand-crocheted with tiny, tiny, thread by one of my grand-mothers. It's probably older than me, and I'm a little over half-a-century 'young'! I love having my personal heirloom treasures near.Linking to:


No comments:
Post a Comment
Thank you for taking the time to leave a note.~Lisa