What a difference they make in my sewing room now!
Before:
After:
My story began with the purchase of this pattern, and I hope to goodness I really did not spend $15.95 on this!
Took the time to meticulously cut out all 8 corresponding pattern pieces, read the directions, sketch my chair, then draw the pattern pieces out on my fabric because I only had 2 yards.... and that was IT...
.... of this beautiful tapestry fabric that was given to me years ago.
My sewing room also doubles as our spare bedroom and look how it coordinates with the bedspread quilt motif/colors below.
Last week's library visit procured this nice book. How could one not pass up an 'Ultimate' sewing book, no less?!
Lingered on this page.... and had one of those 'Aha' moments. Notice this chair's slipcover only used 1 continuous piece of fabric. Different shaped chair, but not really if one transferred the same concept to my chairs.
My chairs were meant to be slipcovered and were purchased at World Market on sale for @$86.00 each. The World Market slipcovers are $34.99 each if you wanted to buy one to fit this chair. But they looked loose fitting to me and thought this could be a challenge project for me.
I've also been reading a lot lately about fitting patterns and fabric in garment sewing so took those thoughts to my chair(s) and ditched my pattern, that I sincerely hope I did not pay $15.95 for, and began to wing it. My fabric measured 58/59" x 72" and by cutting my fabric in half (@29" x 72") I could tell it'd (barely) be enough for each chair. Turned my fabric inside-out, draped and began to pin. Where my pins were would be my seam, so did not have to worry about seam allowances.
My exercise ball worked great as a 'fitting' chair. I could roll around as I pinned. :)
And can you believe, everything worked! This photo is of the two chairs 'done', except for the hem. (hmmm, don't know why that one side looks wonky here). Now I was at a dilemma point, because remember I only had 2 yards of fabric and still needed to hem my chairs and the fabric was too short to just simply turn under and stitch a hem. What to do, what to do. Let's think...
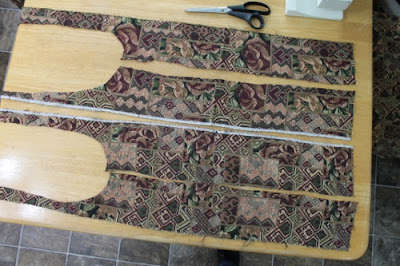
THIS is all the fabric I had left at this point....
So I thought about a contrasting strip of fabric/hem out of this coordinating silk/satin I had from some old window treatments I made yearsssss ago. I wanted a clean look and not introduce another color, even if it coordinated well. So, how about the fringe? I could unpick it and had plenty and it coordinated too.
Can you tell this fringe was purchased in copious quantities years ago and incorporated into almost every window treatment I made?! Not only the photo above, that is currently not in use, but the view to the left in my sewing room....
....and the view to the right. I am TIRED of looking at this fringe!!!! (These window treatments are also on the Update To-Do list too btw!) Plus, I still wanted a nice, clean, fresh updated look.
So with limited fabric
My scraps. Juuuuuust enough as only the strips right next to the squares are 1 1/2" wide. None of the others would've worked.
The front view:
Side view:
Back view:
This tapestry fabric with a random, yet straight-lined design was perfect for slipcovering these chairs. I was able to use the design to my favor, it stretched well, yet doesn't sag.

.jpg)

Holey moley, what a nice job of reupholstery you did, Lisa! I have NEVER attempted upholstering anything (does a pillow form count?) although I've thought about it. I had an acquaintance once tell me that it was easy-peasy and she had all the "tools" I could borrow. I went to her house to look at the pieces she had done. Ooops. I decided right them and there not to take any lessons from her! :o\
ReplyDeleteYour chairs look professionally done. If I ever decide I MUST learn how to reupholster anything, I'm coming to you for the teaching.
Thanks for sharing this post.
Aaahhh, Mama Pea, you're such an encouraging, supportive friend!! I have a feeling that whatever you put your mind to, it would be done beautifully.... but you're always welcome anytime my Minnesota friend! Thank you for your sweet words!
Delete