7.31.2015

Happy Cats! - McCall's Pattern 4979

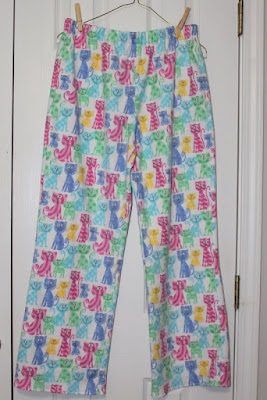
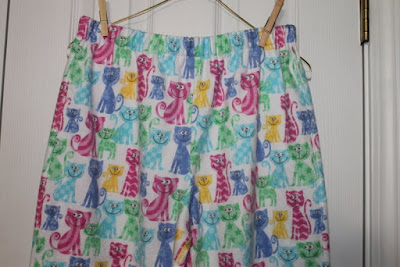
This adorable, fuzzy flannel happy cats fabric was purchased for my youngest daughter, who is a college senior this year of whom has deemed herself never too old for cute kitty flannel pajama pants.  :) 
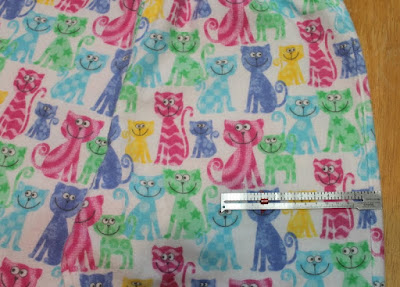
She was thrilled when I brought this fabric home.  Fabric was purchased off the clearance table at Hancock's Fabrics for @$3.50/yard.These cats measure @1 1/2", so they are not small.  Love the happy smiles and almost a googly-eyed effect.
She was so excited, it motivated me to have these made for her before night's end, even though we are suffering with daily 97 degree F temps and these probably won't be worn until Fall.  I love my daughter. 
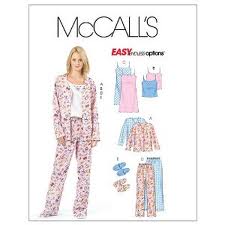
This was the 6th pair of pajama pants I've made for her since 2011, using McCall's M4979.  Such an easy pattern.  Great for beginners.  I've also made myself a comfy outfit from the pants and jacket you can see here.  But this is really 'her' pattern, so I've customized the pattern to fit her.  She wears an XS size with serged seams as the seam allowance.  I do reinforce the crotch seam with my sewing machine.  These pants are high rise, something she does not care for, so I simply turned the top waistline down on both pieces by 5/8".  With a 1" elastic, the casing is turned down 1 3/4".  She likes this.  She still pushes them down a little and they are quite baggy, but that is what she wants.  The legs are baggy, wide and looooooooong.  I've shortened this pattern 4" and hem by barely turning up the fabric's serged edge.  For the next pair, I may lengthen an inch, so she can at least have a 1" hem. 
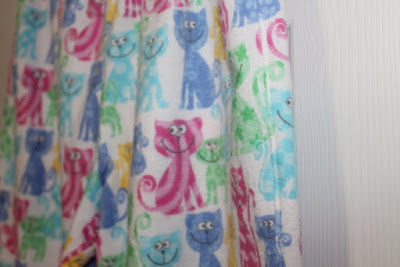
She does not care for pockets (can you imagine?!)..... so no pockets, the pattern does not include pockets, but I've been putting pockets into all my garments recently and knew it would not be a big deal to add them here.  I did faux flat fell the serged outside seams again.  So much easier to do without a pocket to deal with!  You can see a little of the topstitching in the photo below.  And I almost matched up the fabric. Sort of.
Tried to get the cats at least lined up across the front.  All in all these pants take maybe @2 hours to make from start to finish.  I really like how Hancock's flannel fabric fluffed up after pre-washing and drying.  So many times the flannel I've bought at WalMart comes apart from within the fibers after she wears her pants a few times, so I've become extra careful when purchasing flannel fabric. 
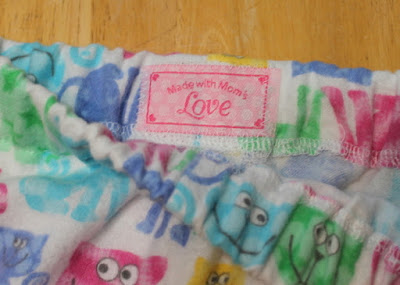
Couldn't believe I almost forgot to put one of my little tags in for her to tell, at-a-glance, the difference between the back and front.
No extra story today.  This one was pretty cut and dried.... but I will say I feel privileged that Melissa, my daughter, still likes for me to make her pajama pants.  I've made her pajama pants for her since she was a little girl, and to this day she only wants to wear the ones I make for her.  She won't let me make anything else for her, as she has a very distinct way she likes to dress and she tells me she would feel bad if I made her something and she ended up not wearing it.  She is sweet.  So I am glad she likes her pajamas pants made by me.

Happy Sewing Everyone!  :)

7.30.2015

Ottobre no. 14 Loose Fit Casual Pants paired with Kirsten Kimono Tee

Today I visited Table Rock State Park to photograph my second pair of Ottobre no. 14 Loose Fit Casual Pants from the Spring/Summer 2015 Ottobre women's pattern magazine.  These are an elastic-waist, narrow leg pair of pants with in-seam pockets.  In these photographs I am wearing it with one of my Kirsten Kimono Tees I made last summer... a free download from Maria Denmark you can access here.
You can see my first pair of Ottobre pants no. 14 here.
This pattern is perfect for me, as I enjoy wearing elastic-waist pants, and with this pair I made a few modifications for a better fit.  I'd like this to be my T-N-T pant pattern as the slim silhouette is flattering and they don't scream 'elastic-waist pants'.
Fabric was purchased off the clearance rack at WalMart for $3.00 per yard.  WalMart doesn't always label their clearance fabric well, so thinking I'd bought a twill, it was a surprise to see 'Protected with COVGARD stamped in the selvedge.  What in the world had I bought?!  Shortly after posting a picture and asking for help on Instagram, Barbara explained that this is a 'stain resistant treatment used by Covington Fabrics meant probably for upholstery or pillows.'  (Covington Fabrics was stamped on the opposite selvedge.  She is good!)  She added that it doesn't mean it can't be used for garments and asked if it softened when it was pre-washed.   It softened well with the pre-wash and dry so onward with my plan.  Oh.... I do like the fact this fabric was stamped 'up' with an arrow showing 'up'..... as unbeknownst to me at the time of purchase.... there is an 'up' (or top) to the design so this helped tremendously when laying out my pattern for cutting, and luckily I'd bought enough to accommodate the extra yardage needed.
This fabric is like a heavy twill, and since my first pair fit sort of snug, I was very conscious of reducing bulk on this one.... and what better way than with the pocket pieces.  I found a cute polka dot soft cotton in the stash to make the in-seam pockets out of.  The arrow is pointing to the understitching that Ottobre has you add to the edges of the pocket opening to pocket pieces after attaching respective front/back pocket pieces to the front/back pant pieces.   I'm going to try and remember this to add it to all my pockets.  It helped everything lay all nice and flat and neatly tucked in.
The outer seams were faux-flat felled.  The way I did this was to snip in the seam allowance just under the pocket before serging from the top of pocket to bottom of pant.  After serging, it needed a little more snipping to bring the serged pant seam to the back while the pocket lay flat to the front.  I then top-stitched close to the seam allowance on the right side, very carefully, from the top of the pocket to the bottom, thus giving the pant seam a flat-felled look.More importantly, this seam will now lay flat and make the pant easier to iron.
The back view.  The biggest change in this pair was to add a full-butt adjustment.  My first attempt at this technique and feel I was successful.  Again, on Instagram, Erin asked how I liked the fit of my first pair.  When I mentioned they were snug and the back felt a little 'low' but I was gonna' use this as motivation to up the exercise routine,  (insert smile here)  she laughed along with me, at the same time encouraging me to think about a full butt adjustment.  Sarah Liz also chimed in about how she likes to raise the back rise on her pants too.  So that got me thinking and off to research how to do a full butt adjustment
Threads Magazine's Sandra Betzina's well written 'Everyone Can Have Jeans that Fit' was perfect.  Easy to understand, simple to do.  I redrew the back pattern piece, came up from the crotch to where I thought was where I needed 'more', cut and slashed one line and opened up 1/2".  She shows two different lines on the drawing below..... I only needed the one lower line.  I also cut a little loosely around the hip areas on both the front and back pieces when I was cutting out the fabric to add just a little extra.  Nothing exact and scientific.... just a smidgeon extra.  All this seemed to have worked as these pants fit me pretty good.  The back rise feels much better.  I may go back and add 1/4" at some point.  Everything else was the same as the first.... 1 1/2" elastic.... 1 1/4" hem..... easy.
Threads Magazine - Sandra Betzina
Thought I'd show you how fantastic my tripod carrier is working out.  I made this out of a self-drafted pattern to make it easier to carry my tripod on these types of photo opportunities.  Today I thought to loop the handles 'round the tripod and voila'! Perfect!  Kept it from getting dirty and more importantly, the pocket gave my glasses a place to hook over while I went back and forth from behind the camera to in front of the camera.  This was a sample for myself and I've since purchased fabric to make the 'real' one. 
Hiked a little ways up the Carrick Creek Trail to take this photo of the lovely waterfall.  This is a local swimming hole for the brave souls who can bear the c-c-c-c-old mountain water.  
And a view from one of the summits.  Table Rock Mountain is the center rock mountain with the smaller tree covered Stool Mountain to the right. 
The rest of the story.......
So I was very excited the full butt adjustment worked, as I tried on these pants for the first time.... and of course had to share my thrill of success with someone.... and who better but one's husband.  "Tom, look..... the full-butt adjustment worked!"   He replies..... "The whaaaaat?!!!"  "Full-butt adjustment!" so full of excitement not realizing this was foreign vocabulary to my sweet husband.  "You did a whaaaat?!!"  He again replied.  And with that he burst out laughing.  I burst out laughing.  And I cannot say it again with a straight face.
I am so thankful for my sewing friends.
We share the same vocabulary.

Happy Sewing Everyone! :)

7.23.2015

An Ottobre outfit at Lake Jocassee
no. 10 Sculpture top and no. 14 Loose Fit pants

With this oh-so-fresh and summery outfit, a water background was needed, so thought I'd take you to one of my most favorite places Devil's Fork State Park with the beautiful Lake Jocassee behind me.  Jocassee, pronounced Joe-cass'-ee, was an area once home to our Cherokee Indians and you can read more about the legend behind the name here.  It is now the name of this manmade lake that is a part of Devil's Fork State Park in Upstate, South Carolina.
I love the way the mountains touch the waters.  Even on this overcast morning the lake is beautiful.  There is a public boat ramp to this side....
...with kayak and canoe rentals this side.  And as with all our mountain waters, this lake water is c-o-l-d, c-o-l-d, c-o-l-d!  The overall lake encompasses 7,500 acres with 75 miles of shoreline.
I'm on the small manmade beach side sharing my spot with this pretty thing who was completely unbothered by my close proximity.
Let's talk about this Ottobre outfit.... no. 10 Sculpture draped blouse and no. 14 Loose Fit casual linen pants.  My pants aren't out of linen.... that's just the name of the pattern.  :)
Both patterns were traced from the women's Ottobre magazine Spring/Summer 2/2015 edition that I picked up earlier this year at my local Barnes & Noble Bookstore.  (btw the Fall 2015 Ottobre women's should be out in August!)  May I say I LOVE this magazine!
This is the third time I've made this cute shirt.  You can see the first two here.  The first version was out of a crepe de chine, the second out of a soft knit and this one is out of 100% white linen.  Perfect!  Third time's the charm!  The magazine describes this top as "asymmetrically-draped" "otherwise loose-cut blouse is a snug fit around the hips."  You can see the pleating on the left shoulder in the line drawing below.  This cute top takes around 1 yard of fabric.
Another fabric purchase at Joann's.  Took a photo of the fabric bolt information for future reference and paid $8.50 per yard for 100% white linen fabric that retails for $16.99, taking advantage of another 50% off sale.  I think I'm liking shopping at Joann's.  :)
The instructions have you start right away with "fold and stitch narrow hem (5mm + 5mm) at front neckline" and from the past two experiences, I knew this was the hardest part about this top.  The neckline is cut almost on the bias, and is tricky to keep from puckering and laying wonky..... so this time I learned a new-to-me technique of how to hand-stitch a narrow rolled hem using Ami Simms awesome video 'How to Sew a Rolled Hem'.  Methinks this neckline turned out pretty darn good this time around.  No puckers, no wonkiness.... nice and flat.  I got the back neckline facing on correctly this time too.  She has you put it on in such a way the ends are all tucked in with less bulk.  All other seams are serged.  Hemmed with a 1 1/4" hem instead of 1" hem per pattern instructions.
I took a few photos at home before leaving for the lake, so here's a closer view of the top being worn.  The pleats at the left shoulder give it nice, unusual drape and design feature.  I also narrowed the hip area on this version, so you can see it fits me snug in the hips to allow the over part to 'drape'.  Love, love, loved working with the white linen. 
Now let's look at the pants.  I've not made these before but liked the look on the model and the line drawing.  Ummm, they say loose fit.....
....but mine fit kinda' snug.  I traced a 38 and probably should've traced a 40.  Do you ever do that?  Trace the size you 'want' to be.... not necessarily what you 'are' at the time?!  This fabric is a 100% cotton Ikat Dot Twill purchased at Hobby Lobby on clearance for $3.00 per yard.  I think I bought 3 yards and have 30" left over.  A pale aqua with white splashy dots of sorts on them.  I thought paired with this white top the look would be 'resort wear'.  Seams are serged and for the pockets I used a combination of Ottobre's instructions, my instructions for Tom's comfy pants I keep on hand and Handmade by Carolyn's In-seam Pockets tutorial.  I need all the help I can get sometimes!   Only other modification I made was to insert a 1 1/2" elastic in a casing instead of making 2 casings for 3/4" elastic then sew them down the middle to create a smaller channeled look per pattern instructions.  I'm just not sure about my fit and didn't want to be locked in to sewn-in elastic.
The magazine shows the model with the pants legs rolled up.... but I like them down.  Love this cropped, narrow leg look.
A little bit of blue sky began peeking out as I was packing up at the lake.....
..... and had to stop and snap a picture of the barn quilt on the Park Ranger's station.
And as everyone has probably figured out by now, there's always more to the story.....

Sooooooo, after I got home with the Ikat Dot Twill fabric and began making the pants, I was overcome by the most horrible feeling that I was making polka dot pajama-looking pants, instead of the classic resort wear I had imagined.   During one of the fittings I asked my husband what he thought.  Did I look like I was wearing pajamas?  No, he assured me..... I looked fine.  About that time my daughter walked in and said 'Hey Mom!  I love your new pajama pants!'   So, please dear readers, be honest with me..... what do you think.... Pajama Pants or Summer Pants.  :}

Happy Sewing Everyone!

7.22.2015

'Pets on Quilts Show' begins August 17, 2015

It's that time of year again where my friend Jacque, Padsworth and Dragon Drop over at Lilypad Quilting are gearing up to host another Pets on Quilts Show for 2015. 

This will be my 2nd year to participate..... well, Towa's 2nd year to participate.  :)  She was in a bit of a grumpy I-don't-want-to-be-photographed mood last year, so hoping this year she's a little more cooperative.  You can see more of last year's entry here.
Towa's 2014 Pets on Quilt Show entry
And of course, when there's no quilt around, she's most photogenic. *sigh*
Anyway, it's a quilt show that's full of fun!  Jacque is a gracious hostess and the other participants I found to be oh-so-nice.  There are many great sponsors including Abbi May's online fabric store and Green Fairy Quilts.... just to name a few, with lots of chances to win prizes. 

The categories :
Participants can enter quilts in these categories:
1. Dog or puppy on quilt
2. Cat or kitten on quilt
3. Other animal on quilt
4. Dog-themed quilt project
5. Cat-themed quilt project
6. Other animal-themed project
I'm still thinking about my entry.  Hmmmmm.... got a work in progress that may get finished in time, but then there's a couple of others that might work.  We'll see.  Meanwhile, looking forward to seeing everyone's beautiful quilts and cute cats and pups.  One year there was a horse.  :)

Happy Sewing Everyone!

7.15.2015

A new dress named Monet. Pattern a, 'Stylish Dress Book' by Yoshiko Tsukiori

I adore my new dress!
My new dress is so very loved that I felt it deserved a special location to be photographed.  Welcome to the Central History Museum!   Located in the heart of the charming small-town of Central, South Carolina this museum is housed in a delightful old home that was built in 1893 by Jeptha and Minnie Morgan.
I love old homes, don't you?!
Could there be anything more charming than an old-time Southern quintessential rocking chair front porch. 
The museum is only open on Sundays, but their grounds have been turned into lovely botanical gardens.....
.....with delightful statues.....
'Having Fun'
.....and barn quilts.  It was a delight to be here this (very hot) July morning!
This dress is another Pattern A, from 'Stylish Dress Book' by Yoshiko Tsukiori.  This pattern fits me well. 
The lovely Silky Print, 100% polyester fabric was purchased at Joann's.   This is where I realized my iPhone camera would be handy to take a photo of the fabric bolt information to be able to refer back to in the future.  Brilliant idea, if I do say so myself.  I'm trying to remember to do that with all new fabric purchases.  Anyway, I only paid $6.50 per yard for this luscious fabric because Joann's was having a 50% off sale this day.  This pretty dress only needs 2 yards.  $13.00 was the cost of my new dress.
A few construction details that I changed from the Pointillism Dress, my dress from the same pattern/book..... was to change the back pleat to a box pleat.  Took in the same width in the back, just flipped the pleat.  The front is gathered as per the pattern instructions, instead of pleated like the modification in the pointillism dress.  I gathered this neckline differently than what I've done in the past by loosening my tension dial.  Kept the same stitch length, but with a loose tension it was easy to gather and the smaller stitches gave it a prettier gathered look than how I'd been doing in the past by lengthening by stitch length or zigzagging over a thread.  Pretty proud of the neckline binding as this fabric is lovely to look at and lovely to touch and has a lovely drape..... but is one big p-a-i-n to sew with!  The edges frayed/shredded like crazy so my great idea to use french seams AND add in-seam pockets changed to add in-seam pockets and serge all the seams.  
Thanks to the lovely Carolyn of Handmade by Carolyn's well-written and photographed tutorial of how to add In-Seam Pockets.... these were a cinch!  Why, oh why did I think adding in-seam pockets would be so difficult!  Now I shall be adding them to EVERYTHING!  :)
A back view.....   oh, I also added a self-fabric tie belt just like the pointillism dress, with the exception that I squared the tie-ends off here.  This dress was lengthened about 3/8" too.
Love it!
And don't you think the name Monet is appropriate?  Reminded me of some of his paintings.
Now I shall tell you the rest of the story.  Today began with the idea that I needed a contrast background for my pretty dress.  I was afraid I would blend in with the landscape otherwise.  So I chose a white historic little church..... looks more like a little chapel.... that I thought would be appropriate because this dress was made to add to my church-going clothing needs.  When I got to the little church, there were a few cars in the parking lot.  Decided it would be a good idea to get permission before beginning any photography, so I sought out the church secretary and told her my little story.  Now keep in mind I absolutely do not feel comfortable taking my pictures in public..... and here I am explaining to this woman how I make my clothes to be photographed for an internationally read blog, and could I please take a few pictures at the front of her very pretty church.  She said 'no'.  She'd have to have the pastor's permission and the pastor was out-of-town and unavailable.  Soooooooo..... awkward!!  When I am embarrassed I either become very quiet, or chatter away.  Evidently today was a chatter day and I found myself telling her that I used to be the pianist for over 8 years at one of this church's sister church.  She begins to sit up a little straighter and says "you play the piano?"  And with that, she tells me the church she attends is looking for a pianist and would I please apply for the position!!!  She then apologizes for not feeling like she can allow me to take photographs at this church..... but by the way she's a member of the Central Museum board and she gives me full approval to take all the photographs I want there.  She was to even call ahead, just in case someone was there doing paperwork, to let them know I was allowed full access to the grounds.   Turned out oh-so-nice, but I will probably never consider taking photographs on private property ever, ever, (ever!) again. 

And after having lunch with my sweet husband, I found this tucked away in my car.  :)
So all's good!