10.28.2016

Corduroy Pillows with Piping and Zipper

Who wants to look at boring custom-made black corduroy pillows, complete with piping and zipper.... when you've got a cute little toy Maltese around!  Yep, thought so.  :)
We enjoy shopping at our local Sam's Club and I could not believe this 60" x 70" gorgeous faux fur leopard throw lined with a most luxurious microfiber suede was only $29.98?!!    Seriously?!  There would be more $$ in the fabric alone to make it myself.  Machine washable and silky soft I knew it must be mine and this one purchase triggered a little re-do of our hearth room.  Ya' know.... coordinating pillows must be made.   There might even be new windows treatments in the works.  Maybe.  ;)
Modeling must be such hard work
Thinking pillows would be a boring post I enlisted Towa's modeling help today.
Cracker?!  Did someone say cracker?!!
The (purchased non-zipper) pillows I had on this loveseat were getting old, but the stuffing was good and the size was perfect.  Using the old pillows as my pattern, I was able to match the cording size for the piping and found enough black corduroy in the stash for pillows around the same size.  Black velour found in the stash was used for the piping.  Kind of thought it'd be nice to have texture on texture even though black just sort of fades into black.  These pillows measures 20 1/4" x 20 1/4" because of fabric limitations.  The old pillows measured 21" x 21" with a 1/2" seam allowance, so figured I was pretty close.  I made 2 identical pillows.
I've made lots of pillows with piping in the past, but never one with a zipper so figured this would be a good chance to learn that process.  I could've used invisible zippers, now that I've got an invisible zipper foot for my machine, but decided to use black all-purpose zippers from the stash because they would never be used in a garment now.  I'm sold on invisible zippers in garments!!  Anyway, got everything cut out and ready to go and found I just could not wrap my head around how to sew the piping AND install the zipper.  A quick Google search later and stumbled on the best video by Peg Baker "How to Sew a Pillow with Piping and Zipper".  She used an all purpose zipper too so I simply followed her easy-to-follow steps and am pleased with how my pillows turned out.  You can see in the photo below the zipper pull I forgot to tuck in for the photograph (whoops!).... and how the zipper butts right up next to the piping at the bottom back.
Another view.... with the zipper pull tucked in.... how it all lays nice and neat.  There is an additional seam that you can see here, where the zipper is sewn in, but I like it.  It's not that noticeable and sort of tucks everything in.  Again, this is at the bottom back of the pillow.
Now that the modeling session is over, little Towa looks more like her usual self.... all happy and sunshine-y.  She's 10+ years now and as you can see from her white eyes, almost completely blind now.  We love her.
And Suzi wants to say hello too this morning!  She's been a part of our lives ever since I gave her to my mother-in-law years ago for a companion dog.  My mother-in-law is unable to live independently anymore, so we are thrilled to have Suzi with us now.
It was fun to pull all the supplies for these two pillows from the stash.  Sometimes that's when it feels more 'creative' to me...... see what I can make with what I have.  Now back to garment sewing!
Happy Sewing Everyone!  :)

10.12.2016

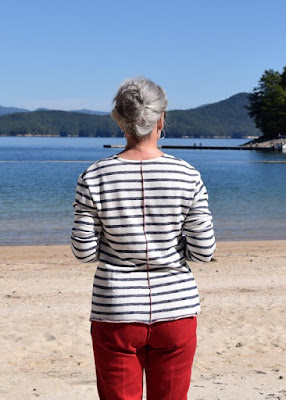
Ottobre Design Woman 05/2016 no. 15 'Like a Warm Hug' top

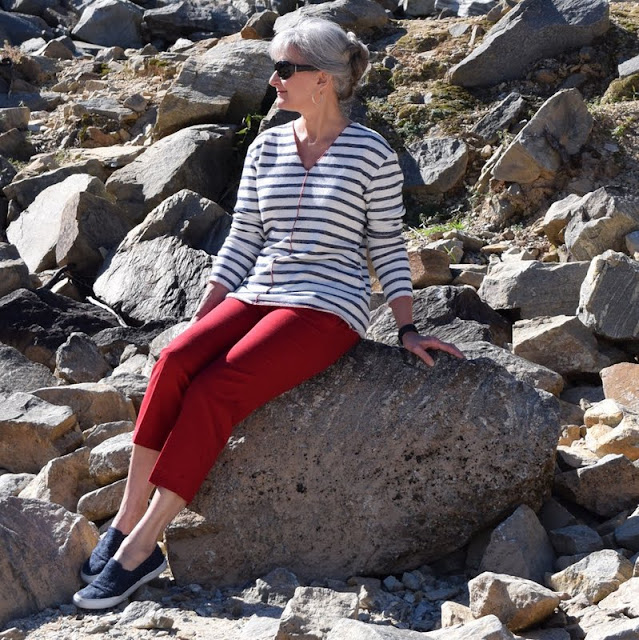
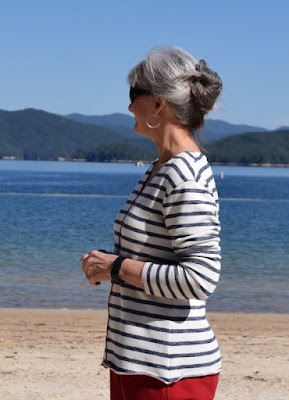
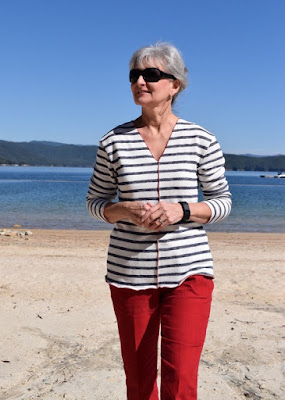
As our South Carolina mountain weather has cooled a bit..... (finally!), it's a perfectly perfect day to venture off to Devil's Fork State Park wearing my new top.
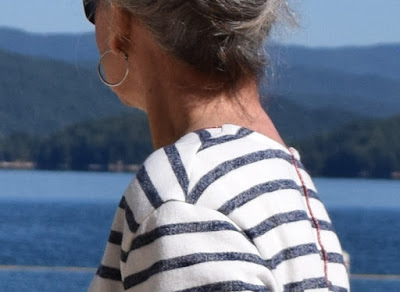
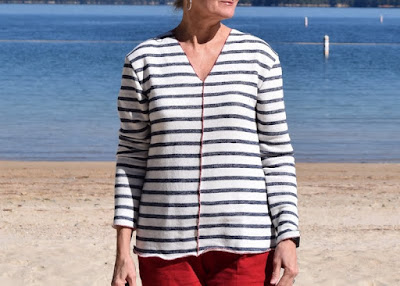
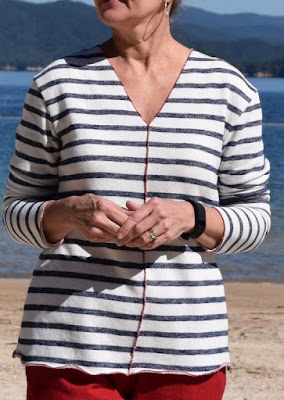
The first thing that might grab your attention are the exposed serged rolled hem seams.  Front v-neckline, center front, center back, sleeve hems and hem are all serged rolled hems. 
The more I make Ottobre patterns, the more I really like them. 
They seem to be designed for my lifestyle and body shape; so, without too much trepidation, I cut a size 38 and stitched this up with no modifications using a sweater knit with terry pile to the inside purchased at Hobby Lobby for @$6.00/yard.  I used 2 yards.   
It really does sew up looking just like the line drawing.
An initial struggle for me was deciding the best way to create the exposed seams.  Should they be left as raw edges, should they be serged, should they be serged rolled hem with matching thread, contrast thread..... on and on... somewhere along the way the thought struck me to use red.....
 ....so red it became!  Not only did those very visible front and back (and of course side-to-side) stripes have to line up..... there was now the concern of the very visible red seam.  I knew if it was not done properly, the mistakes would be glaring.  Struggling to match the stripes with my new Brother 1634D serger to these high expectations while serging, not to mention too chicken  I could not bring myself to take out the stitch finger to use the rolled hem stitch ability as I did not want any drama getting it back in... I thought of my very old Bernette for Bernina FunLock 006D serger that was placed in retirement a few months ago when the Brother was purchased, and decided it must be brought out of retirement and be used again.  Let me pause here a moment and say.... I love my old serger!  Purchased new in the mid-1990's it has been used ever so much with nary a day in the shop, but the last year or two the left needle thread tension had gone out, so I'd only been using it as a 3-thread serger until I bought the Brother.  The Brother cost about what a shop repair would've been, so figured that was being a good steward of my money.  And I do like the Brother for day to day serging..... but oh my goodness..... the Bernette/Bernina purrs and serges oh-so-smoothly compared to the clunkier Brother.  Anyway.... with a click of a lever, the Bernette/Bernina serges the most beautiful rolled hem AND keeps my fabric moving through more evenly than the Brother, even though both machines have differential feeds.  This top begins by serging a rolled hem on both sides of the front V-neckline.  In the photo below, I've already serged the rolled hem on the neckline and have it set up to serge a rolled hem down the center front.   Thanks to a serendipitous photo Carolyn put on IG showing how she pins both the beginning and end of each stripe, I did the same, below, and it worked beautifully.  You can see a little of how my sweet machine has yellowed with age but still serged beautiful rolled hems on this top.  A workhorse!
 The stripes aren't perfectly matched..... but they are acceptable to me.
When I make this again I'll probably add a little to the hip width.
Side view shows stripe matching there too and may I say it was sooooo much easier stitching right sides together, using my Bernina 1230 sewing machine.  Nothing wiggled or moved while sewing there! 
Instead of the 3/8" stretch grosgrain ribbon the pattern required for binding and stabilizing the back neckline, I used bias binding made from a scrap of coordinating fabric from the stash.  Love the way Ottobre has you bind the back neckline as all raw edges are covered and tucked in nice and neat.
I was afraid I would not like the serged rolled hem for the sleeve and top hem, but find it doesn't bother me at all.
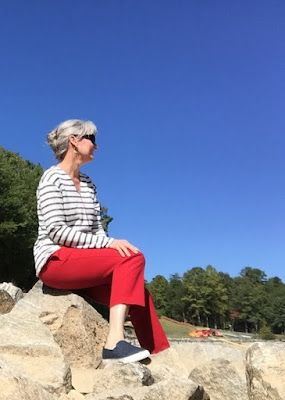
The top goes well with my red Ottobre no. 14 pants.  Overall I really do like this top and can see it getting lots of wear this cooler season!
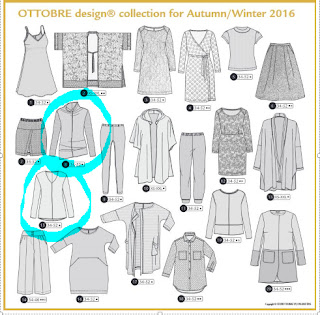
Also this is the first item completed for the Make a Garment a Month October Challenge of 'Sew One'.  Sarah Liz, our lovely moderator of the Make a Garment a Month group comes up with our creative monthly themes and she can be contacted here if you are interested in participating too.  My take on this theme is to use 1 sleeve pattern for 2 different tops. 
The two tops, no. 15 and no. 8, are circled below.  In this 05/2016 issue, Ottobre designed two different tops with the exposed serged rolled hem as a design feature..... with both tops using the same sleeve pattern.  How cool!
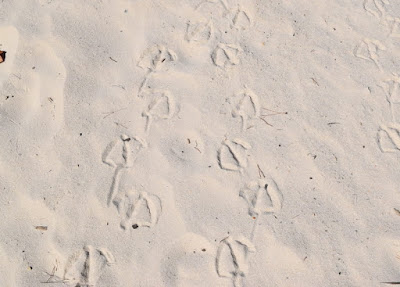
And back to today..... thought it'd be fun to share the very first photo I took this morning when walking upon the sand......
....and the very last.  They flew right over my head.  :)
Happy Sewing Everyone!