1.31.2018

Sherpa Suede Coat | McCall's M9097

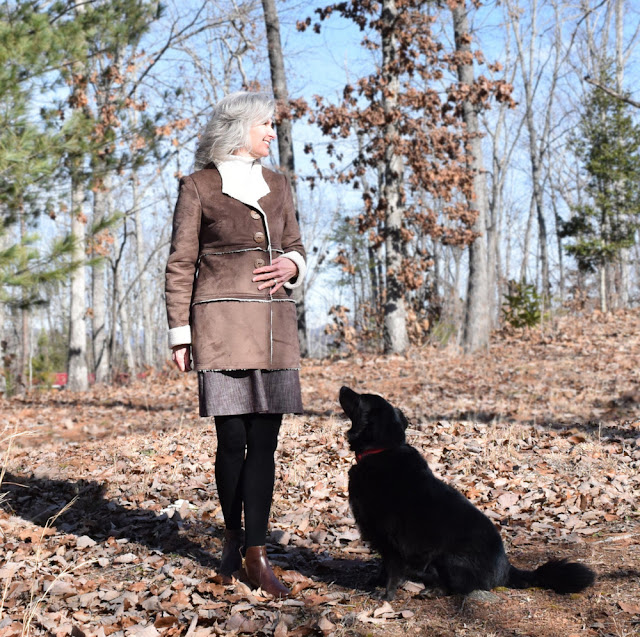
Having wished for a sherpa suede coat for ages..... I finally made myself one using McCall's Pattern Easy Stitch 'n Save M9097.
Living in a small rural town, I am so grateful our local WalMart has a small pattern, fabric and notions department.  Their pattern kiosk recently switched to these $4.97 McCall's Easy stitch 'n save patterns.  For a while it was all NewLook Patterns.... which were all well and good, but it's nice to have access to the ever popular McCall's Pattern brand at a reasonable price.  Hmm, for some reason this pattern is not showing up in the McCall Pattern Company website so I don't know if maybe it's exclusive to WalMart, but I cannot find anything to link to.  The full-length coat, view B, out of sherpa/suede immediately caught my eye and I knew that was 'the one'.
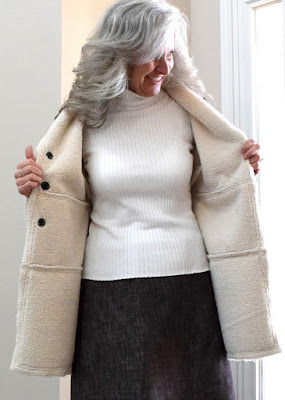
Ever since Carolyn made her gorgeous shearling jacket in 2016, I've been wanting one too and hers was a big factor in choosing this luscious chocolate brown faux suede/Sherpa at my nearby JoAnn Fabric Store.  It was a hard decision because they also carried the same tan Sherpa/suede that the model is wearing above.  I took care in choosing this particular suede/sherpa fabric as I wanted something substantial, not too drapey and thin.  The fabric care instructions read that it is machine washable on cold, line dry.... but I have not washed this yet.  I picked up 3 yards on sale at $15/yard and have enough left over to make a vest.
Following Carolyn's lead on her coat to make sleeve cuffs, I also extended the sleeves by 3" flaring out ever so slightly to be able to simply turn back to make a 'cuff', then sewed down over the sleeve seam to keep it all in place.
Loving the way the exposed Sherpa on the overlapped seam looked on the pattern envelope's front, but neglecting to read the pattern all the way through..... you would not believe how much time was spent researching how to get that overlapped exposed Sherpa seam 'look'.  Many samples were sewn, a few shown below, before all were thrown into one big pile after a while.  The photo below was a late night iPhone photo with not-too-great lighting as I wanted a visual on this process!
Then, and only then did I read my pattern instructions and it was all there!  You can see how the illustration shows how to overlap the seam and sew on the top layer's seamline.  I made it easy on myself by figuring out how to mark the suede to make the overlap easier.  Click on the photo to enlarge to read my notes if interested as there is no way a person could simply overlap seamlines without some sort of guiding point.  So easy after this point and the coat sewed up quickly.....
.....except I decided to sew all semi-flat-felled seams and top-stitch everywhere.  By semi-flat-felled seam..... I mean that I sewed a traditional 5/8" seam, cut the back of the excess of one of the seam allowances off.... like you would for a flat-felled seam..... but instead of wrapping that piece, I simply laid the seam flat and top-stitched it down.  This fabric is too bulky to 'wrap' and by sewing it flat, it flattened all the interior seams out to be able to wear the coat comfortably and finish everything off in a nice way.  My walking foot worked perfectly on this fabric no matter which side of the fabric was 'up' or 'down'.  This also meant the 'quick and easy sew' took a little longer than intended.  But that's okay as these are what makes wearing the garment more enjoyable to wear..... with all the little finishing details done.
The back of the pattern envelope reads 'Semi-fitted jackets have bust and shoulder darts, front extends to form collar and full length sleeves'.  Yes, this is definitely a semi-fitted jacket/coat and the heaviest top I can wear underneath is a turtleneck.  With no cardi.   But I knew this when I bought the pattern and that is what I wanted.  And you guys will be so glad to know the perfectionist me did not fret all these darts in this type of material at all..... I simply measured as best I could, eye-balled, and sewed!  Surprised even myself and all the darts turned out beautiful.  Even the sleeves have darts.
The pattern made the neatest 'collar'!  Love this!
You can see the back neckline a little better here and how the 'collar' forms.  Clever.
And speaking of the back, I wasn't too keen on the way the back looked after sewing the overlapped exposed Sherpa seam, photo below....
.....so that got ripped out and a regular right sides together seam, semi-flat-felled was put in with the same top-stitching used throughout.  I like this better for me.
Again, using Carolyn's beautiful coat as inspiration, I made a matching belt, but found it was too much with all my horizontal exposed seams.
So the belt got ditched and buttons were sewed on covering snaps because this girl was too chicken to cut into my fabric to make a buttonhole.  I shamelessly copied VelvetRibbon and Coco's Loft recent beautiful coats where they both used snaps covered with buttons.  ;)
Both the snaps...
.....and buttons came from WalMart.  The button is 1 1/2" Coconut and I didn't realize until I got home that all three buttons are completely different.  We shall call this a design feature.  I may add one more button later.
I cut an XS at the bust grading to a S from waist and hip on, and when I ripped the center back seam out, I also took in a big chunk from the neckline to the first horizontal seam.  This made the coat fit a little more streamlined on me and not quite so 'hunchbacked' looking... feeling?!  This pattern has no pockets and I've toyed with adding patch pockets but right now am wearing it this way.  Kind of afraid the pockets will detract from all the horizontal lines going on.
I haven't had the time to pull my plans together, but this coat completes the Make a Garment a Month January 2018 theme.  Starting out the year on track!  Yes!
This morning was one of those beautiful South Carolina blue-sky days, but v-v-v-ery cold.  Okay, v-v-v-ery cold for us here, maybe not so cold compared to my more northern friends!  :)  My new coat kept me warm.  And for some reason even Buster wanted in on the photos.  Silly cat.
Happy Sewing Everyone!  :)

1.24.2018

Red & Black Buffalo Plaid Pre-Quilted Vest | Simplicity 4953

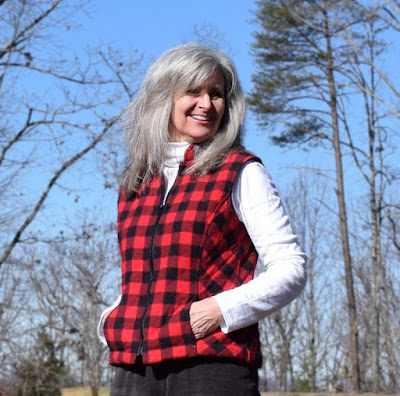
Using a spur-of-the-moment purchase of adorable red and black buffalo plaid pre-quilted fabric, this vest was supposed to be a simple, quick and easy make.  Instead it became one of my biggest, head-scratcher skillbuilder projects that I am so proud of.
Both sets of construction photos captured a bit of interest on Instagram that motivated me to hang in there to the finish line.  What could be so hard about making a vest out of pre-quilted material you might ask?  And that would be a very good question!!  It was because of the pre-quilted material that prompted me to want all seams finished perfectly.  There could be no facings nor lining.... it was all about the seam finishes.  And plaid placement.  Took me forever just to cut the fabric out.
Flat-felled seams seemed the most reasonable choice, as well as using twill tape binding and bias binding to bind and cover all other exposed seams.  That also meant I could not follow the pattern instructions.  Oh, I also wanted to add in-seam pockets finished with a flat-fell seam.
So not only have I never sewn a 'real' flat-felled seam before, but have never put in an in-seam pocket using a flat-fell seam.  Loads of time was spent on research just for the pocket insertion alone.  And then there was the placement of the plaid design..... but I'm getting ahead of myself a little here.  Let's back up and begin at the beginning.
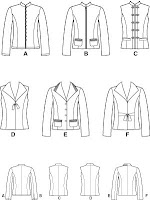
Last year I had picked up this out-of-print Simplicity 4953 pattern at my local thrift store for all of 25 cents thinking the vest and jacket combinations were pretty cute.  So when I found the fabric it just seemed like a modified view C vest would be a good match.  This pattern is dated 2004 and surprisingly calls for shoulder pads in the jackets, but no mention of modifying the pattern to subtract for not using shoulder pads in the vest.  I made a straight size 12 with no modifications and a 5/8" seam allowance.  If..... when I make it again, I'll cut a size 10 at bust grading to size 12 at hips and fool around with the shoulder area as I feel it's a little large-ish.
On a crisp fall day last September, thinking of seasonal wardrobe plans, I made a pretty large fall/winter fabric purchase at my local Jo-Ann Fabric Store, a small portion shown in the photo below.  The red/black pre-quilted fabric was picked up almost as an aside.  Didn't go with the tonal browns and burgundys of the color scheme going on, yet I knew it had to be mine.  You can still order this pre-quilted fabric online here.    Originally 16.99/yard, the pre-quilted plaid fabric was on sale for $7.99/yard and silly me thought 1 1/4 yards of the 53" wide fabric would be enough for a simple vest.   Not until I began laying out the pattern and really thinking about how the plaid would work in the vest, did I realize 1 1/4 yards was going to be tight.  I'm super proud I made it work, even though the collar is pieced in a couple of spots.  Needless to say, there is no scraps.  And that is nice!
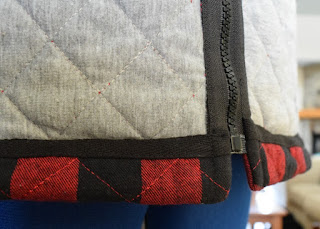
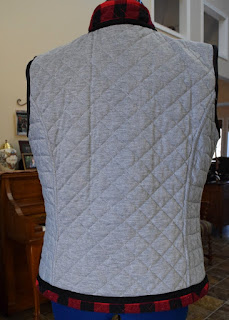
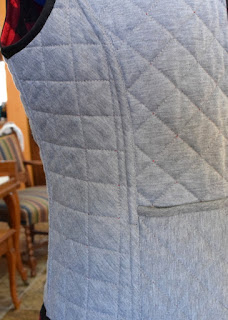
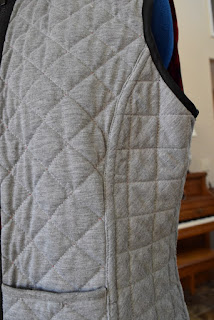
The photo of the inside-out-vest below shows how this fabric is pre-quilted with a red/black buffalo plaid woven 'right side' and a soft gray knit 'wrong side'.  The batting is polyester and you need to be careful to iron on a medium heat setting. Care instructions say 'Dry Clean Only' but on the fabric bolt the fabric content is listed as polyester and cotton so I felt it was safe to pre-wash on gentle cold water cycle.  It came out fine.  I haven't washed the finished vest yet.
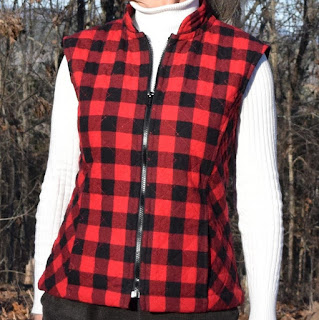
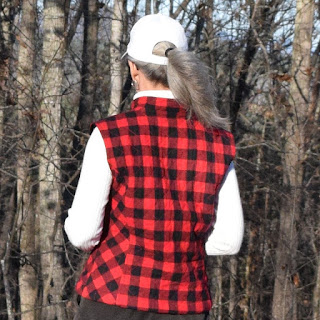
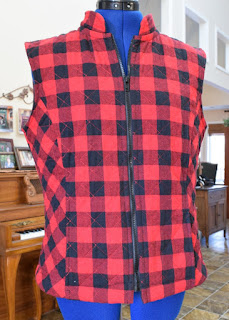
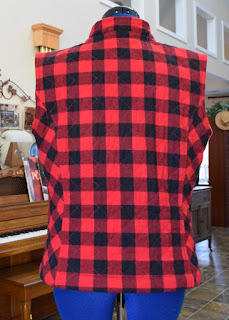
The vibrant rich colors came out a little washed in the photo below but still wanted to show you the finished front and back shots.  Because of the plaid I took out the center back seam and cut on the fold.  See how I centered everything up in the back..... and look at the plaid matching center front through the zip!  Yes!!!!
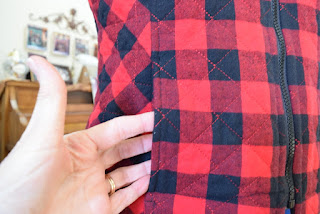
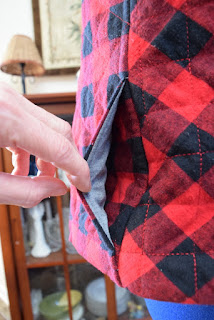
The Thread Blog at fabrics-store.com wrote a most excellent tutorial on constructing flat-felled seams with an in-seam pocket.  I found it hard to find an online tutorial on this skill so am very grateful she took the time to photograph and write hers.  It was easy to follow and turned out well.  I'll be using it again!  By the way, not sure why the pattern does not include any in-seam pockets..... only patch pockets.  So my self-drafted pocket opening ended up a little narrow, but that's okay....
.....it's in and it's all good.  To reduce bulk I used a piece of soft gray knit from the stash for the pocket facing.
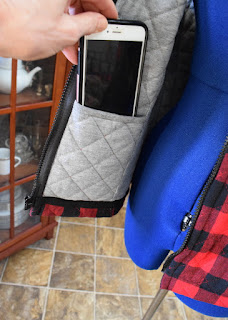
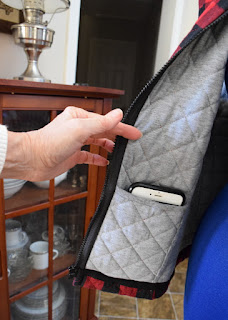
The pocket bags are anchored in the zip, hem and in the front princess seams and I even finished off the top of the pocket bags with a piece of gray knit bias binding.  I seriously wanted absolutely no interior seams left unfinished.  And how cool is this!  Bonus interior pockets!
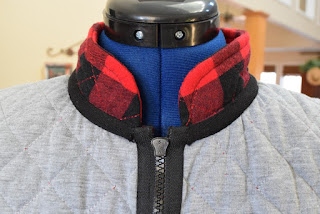
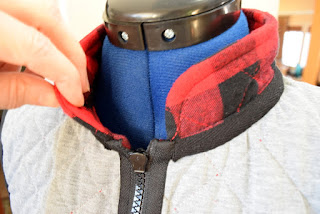
Inside out shots of the front and back.  Here it's easier to see how the zip stops below the collar.  I am weak in collars but, again, am quite proud of how this one turned out.  Because of the sturdiness of the pre-quilted fabric, I did not use any interfacing in this collar.
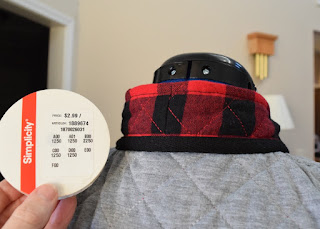
1/2" Simplicity non-flexible black twill tape was used at the collar and hem, and I was a little nervous the collar would not turn out right as binding/tape cut on the bias to be a little more flexible on the collar curve really should have been used.  I just really, really wanted the rugged look of the twill tape!  Knowing this, I trimmed the collar seam and cut lots of clips to the seam line to get everything to stretch as best I could before applying the tape.  It seemed to work well. 
Extremely proud of the flat-felled seams!  I was nervous to snip the princess seams curved seams, so flat-felled them without snipping and think it all looks great.
For some reason where the collar and zip met gave me pause.  I just could not wrap my head around how to finish all this off.  There was such anxiety, a special trip was made to JoAnn Fabric Store to purchase a couple of different sizes of Coats and Clark Separating Sport zippers where it was determined a 20" was perfect.  After all that...... I cut the twill tape a little short.....
.....but am happy with the way the zip tape is all tucked in.  Also added top stitching to the collar.  Top-stitching is also good methinks.
After realizing the twill tape had no stretch on the collar, I made my own black bias binding to finish the armholes out of a piece of bemberg/polyester/satin-ish stuff.  Not wanting a 'shiny' finish, I simply used the 'wrong side' as the 'right side'.   Am thrilled with the way this turned out all nice and neat as this is another area I'm weak in. 
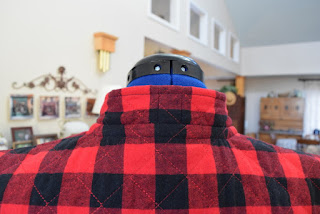
Showing how the back of the collar is pieced.... but also pretty proud of the plaid placement here too.  Paid great attention to detail in this 'simple' project!
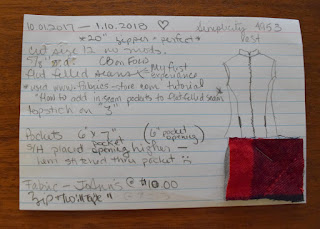
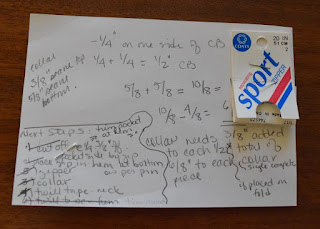
Thought it'd be fun to share a copy of my notecard kept on this proejct.  I keep a notecard just like this on each and every project I make as it is most useful to refer to when making a similar project.
And what was unusual about this one... is that at one point, late at night, when I'd finally figured out which step of construction to do when.... I made myself a little list to check off so I wouldn't forget!!
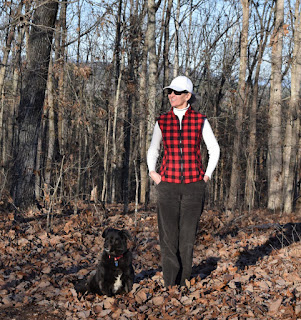
And couldn't close without showing how Suzi and I matched this day.  Her collar is actually red.  Hmmmmm, these pants look baggy and bad and seem to make my legs look larger than they are.  What is going on here?!!!  Have you ever found that what you 'think' looks all fine and dandy, just really might not look so great after looking at photos of yourself! 
 And here's a quick look at an upcoming project that's almost ready to share. 
Whew!  So that closes out this little simple, quick and easy project (Ha!) and I'm ready to make another vest with a few modifications.  It's been great fun learning all these new skills and am looking forward to applying them to future projects.
Happy Sewing Everyone!  :)