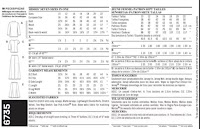
NewLook 6735 was probably one of the first patterns I purchased when I began sewing garments for myself in 2013, so it was quite a surprise to see it's not out-of-print (OOP) and still readily available at the website. So many great patterns go OOP in short order. Wonder how they decide which to retain and which to let go? Hmmmm.
Anyway, this is more of a form-fitting tee with gathering at the side seams in the bustline area, to create what I think is a flattering fit for a tee. The sleeves are inserted 'in the round', which is not my favorite method of sleeve insertion as I never think my gathers turn out quite right, but hey, this is a tee shirt right?! I cut a size 10, grading/adding a little to the hip area and serged all the seams.... so maybe 1/4" seam allowance. I also raised the neckline about 1/2" because this is kind of low for an active tee shirt.
As you can see the back pattern piece has 2 pieces as they are contoured slightly to fit the curve of your back and waist..... which I like and need. One could easily place it on the fold.... but I wanted to sew it up this way and didn't care a bit how the fabric placement came out and was pleasantly surprised to see the almost symmetrical diagonals of the blues.
It only requires a mere 1 1/8 yard of 60" fabric, so used my Blue Shibori Knit from Hobby Lobby that is still available online and I even saw it in my local store last week. Such fun to stand by the bolt 'wearing the fabric' and show the sweet lady who works in that department my 'coordinating' top!! She always asks me what I've been making and I love fabric stores/departments who have kind employees who really care about our craft. Anyway, it has a nice weight and I thought the fabric colors and pattern were kind of neat and different. Sewing by Shirley made a cute top out of the very same fabric you can see here.

Truth be told..... the whole reason I completed the neckline with hand-stitching back then is because I was too much of a coward to tackle putting a knit binding on a neckline by machine..... and machine-finishing the hems and sleeve hems. But not this time!! Everything was serged and machine-stitched with success. It was fun to play around with the neckline binding to figure out where I wanted the darker and lighter blues. I zigzagged top-stitched the binding, below.
Applying neckline binding is still a new skillset for me that always seems to give me pause. And because I'd modified the neckline anyway, I only used the neckline binding pattern piece to give me the width of the neckline binding..... measured my finished tee shirt neckline..... then took 20% of that figure..... added 1/4" seam allowance..... and voila'..... now have my new neckline binding numbers to cut. Divided my top's neckline in quarters.... divided my neckline binding in quarters after sewing the binding together at the short ends.... and it's a perfect fit for me. Not pulling too tight, not sagging/gaping because the neckline is too loose. Yes!!! Lori, from Girls in the Garden, wrote a great Knit Neckband Tutorial that explains all this in much better detail. Also, below, with the top inside/out.... wanted to show you how I stabilized the shoulder seams with a piece of handmade bias binding simply pinned to the shoulder seam and top-stitched being careful to line up the stitching so it will look nice from the right side.
As I am feeling better and making new routines, I decided to experiment with my iphone today for the outdoor photos and was pleasantly surprised that in 2 shots, less than 5 minutes..... we had our photos for the blog. This shot includes the old caboose set up by this trail head as part of the 'rails to trails' project that has been extremely successful in drawing tourists and residents to our area to enjoy 22+ miles of uninterrupted biking and walking along old historic railbeds that have been overlaid with asphalt. This particular spot connects to a university campus lakeside trail that welcomes all to use. It's become my favorite place to walk now.
I've shown the beautiful university's clock tower by the lake before.... and this photo was taken one evening walking around the lake with my daughter as we drank chocolate milkshakes......
.....that's when my daughter noticed this small child statue, below, sitting way up on a little hill, setback from the trail around the lake, but with dark descending, and our milkshakes about gone, it was time to get on home so figured today would be a good day to check it out with Suzi. Little did I realize, Suzi would be scared to death of this!!! She's usually a pretty 'chill' dog so it was quite a surprise when she about yanked the leash off my arm as we casually walked up to the little boy statue. With lots of treats in hand it took a few minutes to show Suzi all was okay and soon she was sitting by the little boy, almost looking at him like "Well, Hi there?!" Though she looks youthful, with little gray around her muzzle, Suzi is over 13 years old and sometimes I wonder if her eyesight might be changing a bit. Anyway, the little boy statue had no description plaque, nor identification of any sort..... and there's no other statues around the lake. A mystery of who he might be, or represent. He is utterly lovely.
This is the little boy statue's view, below.
Got a few more completed projects to show you soon. Meanwhile....
Happy Sewing All!!
EDITED TO ADD: Forgot to mention that I'm wearing the white Itch to Stitch Belize shorts in this post.


